- Download the
tar.gzpackage and unpack it
a)可以使用perl -MCPAN -e shell
b)出現標題error
c)去$HOME/.cpan/build/DBD-Oracle-xxx
d)執行以下步驟 2,3 ...
- Build it
perl Makefile.PL -l make && make test - Install
make install
2014年12月30日 星期二
使用 oracle instantclient 安裝 Perl DBD::Oracle 出現 Unable to locate an oracle.mk or other suitable *.mk
http://stackoverflow.com/questions/26200174/error-while-installing-dbdoracle
使用 oracle instantclient 安裝 Perl DBD::Oracle 出現 Unable to locate an oracle.mk or other suitable *.mk
http://stackoverflow.com/questions/26200174/error-while-installing-dbdoracle
- Download the
tar.gzpackage and unpack it
a)可以使用perl -MCPAN -e shell
b)出現標題error
c)去$HOME/.cpan/build/DBD-Oracle-xxx
d)執行以下步驟 2,3 ...
- Build it
perl Makefile.PL -l make && make test - Install
make install
2014年12月10日 星期三
CentOS 6.2 安裝 Apache/2.2.15 and PHP/5.2.17
1. OS version
[root@EIP-API-AP php-5.2.17]# lsb_release -a
LSB Version: :core-4.0-amd64:core-4.0-noarch:graphics-4.0-amd64:graphics-4.0-noarch:printing-4.0-amd64:printing-4.0-noarch
Distributor ID: CentOS
Description: CentOS release 6.2 (Final)
Release: 6.2
Codename: Final
2. Apache version
[root@EIP-API-AP php-5.2.17]# httpd -v
Server version: Apache/2.2.15 (Unix)
Server built: Oct 16 2014 14:48:21
3. PHP version
php-5.2.17
4. 拿掉/安裝 不要service
chkconfig iptables off
chkconfig postfix off
yum install vsftpd.x86_64 (vim /etc/vsftp/vsftpd.conf --> userlist_deny=NO)
5. OS command
yum install httpd-devel
yum install gcc
yum install libxml2-devel
yum install mysql-devel
yum install autoconf
cp -rp /usr/lib64/mysql/libmysqlclient.so.16.0.0 /usr/lib/libmysqlclient.so
./configure --with-apxs2=/usr/sbin/apxs --with-mysql
make
make test
make install
cp php.ini-recommended /usr/local/lib/php.ini
6. vim httpd.conf
<FilesMatch \.php$>
SetHandler application/x-httpd-php
</FilesMatch>
7. vim php.ini
short_open_tag=on (這樣<% 才認得,否則只能用 <?php)
8. OS command
service httpd restart
9. install oracle instant client
rpm -U oracle-instantclient12.1-basic-12.1.0.2.0-1.x86_64.rpm
rpm -U oracle-instantclient12.1-devel-12.1.0.2.0-1.x86_64.rpm
10. download oci8
ln -s /usr/lib/oracle/12.1/client64/lib/libclntsh.so.12.1 /usr/lib/oracle/12.1/client64/lib/libclntsh.so
tar zxvf oci8-2.0.8.tgz
cd oci8-2.0.8
phpize
./configure --with-oci8=shared,instantclient,/usr/lib/oracle/12.1/client64/lib
make
make install
11. vim /usr/local/lib/php.ini
extension_dir = "/usr/local/lib/php/extensions/no-debug-non-zts-20060613/"
extension=oci8.so
12. service httpd restart
13. mysqli installation
cd ~/Downloads/php-5.2.17/ext/mysqli/
phpize
./configure --prefix=/usr/local/mysqli --with-php-config=/usr/local/bin/php-config --with-mysqli=/usr/bin/mysql_config
make
make install
vim /usr/local/lib/php.ini (extension=mysqli.so)
14. phpinfo
check if oci8 installed
2014年12月9日 星期二
linux 幾個關掉或開啟service的方法
http://carl830.pixnet.net/blog/post/58991014-linux-%E5%B9%BE%E5%80%8B%E9%97%9C%E6%8E%89%E6%88%96%E9%96%8B%E5%95%9Fservice%E7%9A%84%E6%96%B9%E6%B3%95
(如果想立即開啟或關掉就要用service 或是直接到/etc/init.d/底下去操作)
以下是用來設定在系統開啟時預設要執行的service
在RedHat系列底下可以用chkconfig
啟用httpd(如果已經加到chkconfig裡了 就可以不用輸入第一行)
停用httpd(第二行是把httpd從chkconfig的管理中移除 我的建議是輸入第一行就好了)
在Debian或Ubuntu底下的話 可以用update-rc.d
開啟apache2
service開啟httpd
(如果想立即開啟或關掉就要用service 或是直接到/etc/init.d/底下去操作)
以下是用來設定在系統開啟時預設要執行的service
在RedHat系列底下可以用chkconfig
啟用httpd(如果已經加到chkconfig裡了 就可以不用輸入第一行)
chkconfig httpd --add
chkconfig http on
停用httpd(第二行是把httpd從chkconfig的管理中移除 我的建議是輸入第一行就好了)
chkconfig httpd off
chkconfig httpd --del
在Debian或Ubuntu底下的話 可以用update-rc.d
開啟apache2
update-rc.d apache2 defaults關掉apache2
update-rc.d -f apache2 remove至於前面提到的service 這裡提供一些簡單的範例(找不到這個指令的話可以用套件管理找找看)
service開啟httpd
service httpd start用service關閉httpd
service httpd stop
2014年11月17日 星期一
What's blocking my lock?
http://www.orafaq.com/node/854
If you've ever gotten a phone call from an annoyed user whose transaction just won't go through, or from a developer who can't understand why her application sessions are blocking each other, you know how useful it can be to identify not just whose lock is doing the blocking, but what object is locked. Even better, you can identify the exact row that a session is waiting to lock.
Create a blocking lock
To begin, create a situation where one user is actively blocking another. Open two sessions. Issue the following commands in Session 1 to build the test table:SQL> create table tstlock (foo varchar2(1), bar varchar2(1)); Table created. SQL> insert into tstlock values (1,'a'); 1 row created. SQL> insert into tstlock values (2, 'b'); 1 row created. SQL> select * from tstlock ; FOO BAR --- --- 1 a 2 b 2 rows selected. SQL> commit ; Commit complete.Now grab a lock on the whole table, still in Session 1:
SQL> select * from tstlock for update ;And in Session 2, try to update a row:
SQL> update tstlock set bar=
  2  'a' where bar='a' ;
This statement will hang, blocked by the lock that Session 1 is holding on the entire table.
Identify the blocking session
Oracle provides a view, DBA_BLOCKERS, which lists the SIDs of all blocking sessions. But this view is often, in my experience, a good bit slower than simply querying V$LOCK, and it doesn't offer any information beyond the SIDs of any sessions that are blocking other sessions. The V$LOCK view is faster to query, makes it easy to identify the blocking session, and has a lot more information.SQL> select * from v$lock ; ADDR KADDR SID TY ID1 ID2 LMODE REQUEST CTIME BLOCK -------- -------- ---------- -- ---------- ---------- ---------- ---------- ---------- ---------- AF9E2C4C AF9E2C60 479 TX 131078 16739 0 6 685 0 ADDF7EC8 ADDF7EE0 422 TM 88519 0 3 0 697 0 ADDF7F74 ADDF7F8C 479 TM 88519 0 3 0 685 0 ADEBEA20 ADEBEB3C 422 TX 131078 16739 6 0 697 1 .... .... ... ... .... .... .... .... .... ....Note the BLOCK column. If a session holds a lock that's blocking another session, BLOCK=1. Further, you can tell which session is being blocked by comparing the values in ID1 and ID2. The blocked session will have the same values in ID1 and ID2 as the blocking session, and, since it is requesting a lock it's unable to get, it will have REQUEST > 0.
In the query above, we can see that SID 422 is blocking SID 479. SID 422 corresponds to Session 1 in our example, and SID 479 is our blocked Session 2.
To avoid having to stare at the table and cross-compare ID1's and ID2's, put this in a query:
SQL> select l1.sid, ' IS BLOCKING ', l2.sid
  2  from v$lock l1, v$lock l2
  3  where l1.block =1 and l2.request > 0
  4  and l1.id1=l2.id1
  5  and l1.id2=l2.id2
SQL> /

       SID 'ISBLOCKING'         SID
---------- ------------- ----------
       422  IS BLOCKING         479

1 row selected.
Even better, if we throw a little v$session into the mix, the results are highly readable:SQL> select s1.username || '@' || s1.machine 2 || ' ( SID=' || s1.sid || ' ) is blocking ' 3 || s2.username || '@' || s2.machine || ' ( SID=' || s2.sid || ' ) ' AS blocking_status 4 from v$lock l1, v$session s1, v$lock l2, v$session s2 5 where s1.sid=l1.sid and s2.sid=l2.sid 6 and l1.BLOCK=1 and l2.request > 0 7 and l1.id1 = l2.id1 8 and l2.id2 = l2.id2 ; BLOCKING_STATUS ---------------------------------------------------------------------------------------------------- BULKLOAD@yttrium ( SID=422 ) is blocking BULKLOAD@yttrium ( SID=479 ) 1 row selected.There's still more information in the v$lock table, but in order to read that information, we need to understand a bit more about lock types and the cryptically-named ID1 and ID2 columns.
Lock type and the ID1 / ID2 columns
In this case, we already know that the blocking lock is an exclusive DML lock, since we're the ones who issued the locking statement. But most of the time, you won't be so lucky. Fortunately, you can read this information from the v$lock table with little effort.The first place to look is the TYPE column. There are dozens of lock types, but the vast majority are system types. System locks are normally only held for a very brief amount of time, and it's not generally helpful to try to tune your library cache, undo logs, etc. by looking in v$lock! (See the V$LOCK chapter in the Oracle Database Reference for a list of system lock types.)
There are only three types of user locks, TX, TM and UL. UL is a user-defined lock -- a lock defined with the DBMS_LOCK package. The TX lock is a row transaction lock; it's acquired once for every transaction that changes data, no matter how many objects you change in that transaction. The ID1 and ID2 columns point to the rollback segment and transaction table entries for that transaction.
The TM lock is a DML lock. It's acquired once for each object that's being changed. The ID1 column identifies the object being modified.
Lock Modes
You can see more information on TM and TX locks just by looking at the lock modes. The LMODE and REQUEST columns both use the same numbering for lock modes, in order of increasing exclusivity: from 0 for no lock, to 6 for exclusive lock. A session must obtain an exclusive TX lock in order to change data; LMODE will be 6. If it can't obtain an exclusive lock because some of the rows it wants to change are locked by another session, then it will request a TX in exclusive mode; LMODE will be 0 since it does not have the lock, and REQUEST will be 6. You can see this interaction in the rows we selected earlier from v$lock:ADDR KADDR SID TY ID1 ID2 LMODE REQUEST CTIME BLOCK -------- -------- ---------- -- ---------- ---------- ---------- ---------- ---------- ---------- AF9E2C4C AF9E2C60 479 TX 131078 16739 0 6 685 0 ADEBEA20 ADEBEB3C 422 TX 131078 16739 6 0 697 1Note that ID1 and ID2 in Session 2, which is requesting the TX lock (LMODE=0, REQUEST=6), point back to the rollback and transaction entries for Session 1. That's what lets us determine the blocking session for Session 2.
You may also see TX locks in mode 4, Shared mode. If a block containing rows to be changed doesn't have any interested transaction list (ITL) entries left, then the session acquires a TX lock in mode 4 while waiting for an ITL entry. If you see contention for TX-4 locks on an object, you probably need to increase INITRANS for the object.
TM locks are generally requested and acquired in modes 3, aka Shared-Row Exclusive, and 6. DDL requires a TM Exclusive lock. (Note that CREATE TABLE doesn't require a TM lock -- it doesn't need to lock any objects, because the object in question doesn't exist yet!) DML requires a Shared-Row Exclusive lock. So, in the rows we selected earlier from v$lock, you can see from the TM locking levels that these are DML locks:
ADDR     KADDR           SID TY        ID1        ID2      LMODE    REQUEST      CTIME      BLOCK
-------- -------- ---------- -- ---------- ---------- ---------- ---------- ---------- ----------
ADDF7EC8 ADDF7EE0        422 TM      88519          0          3          0        697          0
ADDF7F74 ADDF7F8C        479 TM      88519          0          3          0        685          0
Identifying the locked object
Now that we know that each TM row points to a locked object, we can use ID1 to identify the object.SQL> select object_name from dba_objects where object_id=88519 ; OBJECT_NAME -------------- TSTLOCKSometimes just knowing the object is enough information; but we can dig even deeper. We can identify not just the object, but the block and even the row in the block that Session 2 is waiting on.
Identifying the locked row
We can get this information from v$session by looking at the v$session entry for the blocked session:SQL> select row_wait_obj#, row_wait_file#, row_wait_block#, row_wait_row#
2* from v$session where sid=479 ;
ROW_WAIT_OBJ# ROW_WAIT_FILE# ROW_WAIT_BLOCK# ROW_WAIT_ROW#
------------- -------------- --------------- -------------
88519 16 171309 0
This gives us the object ID, the relative file number, the block in
the datafile, and the row in the block that the session is waiting on.
If that list of data sounds familiar, it's because those are the four
components of an extended ROWID. We can build the row's actual
extended ROWID from these components using the DBMS_ROWID package. The
ROWID_CREATE function takes these arguments and returns the ROWID:SQL> select do.object_name, 2 row_wait_obj#, row_wait_file#, row_wait_block#, row_wait_row#, 3 dbms_rowid.rowid_create ( 1, ROW_WAIT_OBJ#, ROW_WAIT_FILE#, ROW_WAIT_BLOCK#, ROW_WAIT_ROW# ) 4 from v$session s, dba_objects do 5 where sid=543 6 and s.ROW_WAIT_OBJ# = do.OBJECT_ID ; OBJECT_NAME ROW_WAIT_OBJ# ROW_WAIT_FILE# ROW_WAIT_BLOCK# ROW_WAIT_ROW# DBMS_ROWID.ROWID_C --------------- ------------- -------------- --------------- ------------- ------------------ TSTLOCK 88519 16 171309 0 AAAVnHAAQAAAp0tAAAAnd, of course, this lets us inspect the row directly.
SQL> select * from tstlock where rowid='AAAVnHAAQAAAp0tAAA' ;

FOO BAR
--- ---
1   a
Conclusion
We've seen how to identify a blocking session, and how to inspect the very row that the waiting session is waiting for. And, I hope, learned a bit about v$lock in the process.About the author
Natalka Roshak is a senior Oracle and Sybase database administrator, analyst, and architect. She is based in Kingston, Ontario, and consults across North America. More of her scripts and tips can be found in her online DBA toolkit at http://toolkit.rdbms-insight.com/ .2014年10月28日 星期二
log table and log library
table : azo_file
library : cl_azolog
DATABASE ds
GLOBALS "../../config/top.global"
FUNCTION cl_azolog(p_key,p_fn,p_src,p_tag)
DEFINE p_key VARCHAR(40), # 索引值
p_fn VARCHAR(20), # 欄位名稱
p_src VARCHAR(500), # 原始值
p_tag VARCHAR(500), # 異動值
p_log LIKE azo_file.azo06
LET p_log = p_fn CLIPPED,' ',p_src CLIPPED,'->',p_tag CLIPPED
WHENEVER ERROR CONTINUE
INSERT INTO azo_file VALUES (g_prog,g_user,g_today,g_time,p_key,p_log)
WHENEVER ERROR CALL cl_err_msg_log
INSERT INTO tc_mem_file VALUES (g_prog,g_user,g_today,g_time,p_key,p_fn,p_src,p_tag)
END FUNCTION
2014年10月27日 星期一
將繁體中文 charset = utf-8 的網頁,parsing後,轉為big-5 存文字檔
use Encode;
$text = decode("utf8",$text);
$text = encode("big5",$text);
之後FTP到Windows OS,office 才不會看到亂碼
$text = decode("utf8",$text);
$text = encode("big5",$text);
之後FTP到Windows OS,office 才不會看到亂碼
如何解決 Perl parsing HTML 有 等特殊符號的問題
其實可以用
use Data::Dump;
...
...
...
#$text是有問題的html code
print Data::Dump->dump($text), "\n";
會有以下結果:
("Data::Dump", "Tel\xEF\xBC\x9A02 - 25590489 \xA0")
==> \xA0 是 的Perl 字串
所以用以下程式將 替換掉
$text =~ s/\xa0//;
use Data::Dump;
...
...
...
#$text是有問題的html code
print Data::Dump->dump($text), "\n";
會有以下結果:
("Data::Dump", "Tel\xEF\xBC\x9A02 - 25590489 \xA0")
==> \xA0 是 的Perl 字串
所以用以下程式將 替換掉
$text =~ s/\xa0//;
使用 VIM 進行 HEX Mode 編輯 (16進位編輯)
http://changyy.pixnet.net/blog/post/25633298-%E4%BD%BF%E7%94%A8-vim-%E9%80%B2%E8%A1%8C-hex-mode-%E7%B7%A8%E8%BC%AF-%2816%E9%80%B2%E4%BD%8D%E7%B7%A8%E8%BC%AF%29
想說以前都用 UltraEdit 編輯遊戲存檔,沒想到 VIM 也能這樣做。
只要編輯時,下 :%! xxd ,就會以 Hex Mode 顯示檔案,然後編輯完想返回可以再用 :%! xxd -r 接著再存檔囉
想說以前都用 UltraEdit 編輯遊戲存檔,沒想到 VIM 也能這樣做。
只要編輯時,下 :%! xxd ,就會以 Hex Mode 顯示檔案,然後編輯完想返回可以再用 :%! xxd -r 接著再存檔囉
2014年10月20日 星期一
2014年10月14日 星期二
2014年10月8日 星期三
陸游 十一月四日風雨大作/示兒
https://tw.knowledge.yahoo.com/question/question?qid=1205081706736
《十一月四日風雨大作》/陸游
僵臥孤村不自哀,尚思為國戍輪臺。
夜闌臥聽風吹雨,鐵馬冰河入夢來。
--------------------------------------------------------
十一月四日:指宋光宗淳邵熙三年十一月四日
僵臥:直艇地躺著
不自哀:不為自己的不幸遭遇而悲哀
戍:防守邊疆
輪臺:漢代西域地名(今新疆輪臺縣)
夜闌:夜深
冰河:指封凍的河流
這是一首抒情詩,是詩人晚年閒居山陰時所作。當時陸游已68歲,儘管年近古稀,處境孤獨險惡,仍渴望為國效忠,戍守邊防,表露了詩人的剛毅精神。
前兩句直抒胸臆。"僵臥"既交代了年邁,又象徵環境困苦。"孤村"被朝廷棄置不用,無人過問,仍"不自哀",還在想著"戍輪臺"。
後兩句轉入風雨和夢境的描寫。"夜闌"表示詩人為國勞心,常常難以入睡,直到深夜。"風雨"也是喻指當時南宋統治的政治氣候。固有的"風雨",自己的金戈 鐵馬氣吞殘虜的雄心遐想,只能寄託在夢中了,已只是一場空而已。"入夢來"既反映報國願望之強,又是對投降派的有力諷刺。而此夢更是不眠之夢,強化他老而 彌堅的形象,比從現實著筆更加深一層。
《示兒》/陸游
死去原知萬事空,但悲不見九州同。
王師北定中原日,家祭無忘告乃翁。
------------------------------------------------------
示兒:給兒子看,"示"字兼有訓示之意
原:原來的意思
但:只
九州:古代把中國劃分為九州,後來就把九州代稱中國
王師:南宋的軍隊
中原:泛指淮北一帶,當時為金人所佔
家祭:祭祀祖先
乃翁:你的父親
此詩是陸游的絕筆詩,終年85歲。詩人懷著臨終前不見中原恢復的遺恨,藉對兒子的遺囑,述說一生壯志未酬的悵怨。
開篇以"死"字著筆。詩人在病褟彌留之際,此時,要說之事,可謂千頭萬緒,詩人此刻萬事俱可忘懷,唯一事,就是變成土中枯骨也放不下的便是"九州同",唯念淪喪的國土。
結末二句,詩人以殷切的叮嚀口吻,囑托兒孫國土收復之日,家祭之時,不要忘記把喜訊告知你死去的父親。
此詩構思奇異,境界開闊。人死萬事皆空,卻有一事懸心不忘,自是感人之情。
2014年10月6日 星期一
perl HTML::TokeParser example
#!/usr/bin/perl
#use strict;
use LWP::Simple;
use HTML::TokeParser;
use Encode;
#my $html = get("https://www.iyp.com.tw/leisure/Hotels.html");
#my $html = get("https://www.iyp.com.tw/showroom.php?cate_name_eng_lv1=leisure&cate_name_eng_lv3=Hotels&p=0");
my $i;
open FILE ," >output.csv";
for ($i=0 ; $i<=60 ; $i++) {
my $html = get("https://www.iyp.com.tw/showroom.php?cate_name_eng_lv1=leisure&cate_name_eng_lv3=Hotels&p=$i");
my $stream = HTML::TokeParser->new(\$html);
my %image = ( );
while (my $token = $stream->get_token) {
#if ($token->[2]{"title"} ne "" && $token->[2]{"target"} eq "_blank") {
#if ($token->[0] eq 'S' && $token->[1] eq 'a' && $token->[2]{"class"} ne "more-btn") {
if ($token->[0] eq 'S' && $token->[1] eq 'a' && $token->[2]{"target"} eq "_blank" && $token->[2]{"class"} ne "more-btn") {
my ($tel) = $token->[2]{"href"} =~ m/(\d+)/;
print FILE "$tel" ."#\t";
#print FILE encode("big5",$token->[2]{"title"}). "\t";
print FILE $token->[2]{"title"}. "#\t";
}
if ($token->[0] eq 'S' && $token->[1] eq "span" && $token->[2]{"title"} eq "查看地圖") {
my ($misc,$addr) = $token->[2]{"go-map"} =~ m/(\/\/.*=)(.*)/;
#print FILE encode("big5",$addr) ."\n";
print FILE $addr ."\n";
#print $token->[2]{"go-map"}. "\n"
}
#}
}
}
close FILE;
2014年10月3日 星期五
北京話中有希伯來語?有趣的比較
http://www.chinatimes.com/realtimenews/20141004001862-260405

「燒麥」又叫燒賣,被認為是受胡人影響而發明的食品,在希伯來語有個同音同義字Shemesh。(取材自網路)
希伯來語與華語,乍看之下像是天南地北的兩種語言,但學者石旭昊的考證,卻有令人吃驚的結果。北京屬於大河北地區,這
一地區包括河北、北京、天津、山西、陝西,甚至遠達現在西南的重慶東北部。由於古代羯胡人長期活躍在中國北方一帶,而且羯胡人的祖先是古希伯來人,因此北
京話中存有大量的希伯來語詞彙。
比如「得吧」,在北京話中是「說話」的意思,與古希伯來語同音同義,希伯來語發音 Dabar。
再比如,北京人常吃的「燒麥」,這也是羯胡人遷徙到中國北方發明的食品,與希伯來語同音同義,希伯來語的發音是Shemesh。
北京人常稱村 莊為「屯厄」(帶兒化音),而在《舊約聖經》中的希伯來語,也是如此稱呼村莊的,希伯來語的發音是Duwr。
其實,北京兒化音的形成原因,就與很多外來詞 彙有關。
類似的還有很多,例如:
「俺」,這個詞是北京和北方人「我」、「我的」意思,希伯來語也是同音同義,希伯來語的發音An和Ammi。
「丫頭」,「鴨蛋兒」,是北京人或北方人形容小女孩的,希伯來語同樣是這個意思,希伯來語的發音是Yaldah。
「別介」,是北京人表達否定的說法,相當於英語中No的意思,希伯來的發音是Bil-tsi與希伯來語同音同義。
「甭」,這個詞彙是北京表示否定之意,《舊約聖經》中的希伯來語同樣也是這個意思,發音是Bal。
「胡同」,這個北京最常見的地方,很多人以為是來自蒙古語,其實不對。實際也是希伯來語,發音是Hoot,同樣也是小街道的意思。
「捻兒」,在北京話中是燈芯的意思,在希伯來語中的意思是一樣的,也是照亮、照明以及光明有關的東西。希伯來語的發音是Ryn,Niyr。實際上我認為北京著名的兒化音,就是外來語的明顯印跡。
「坷垃」,表示硬土塊和石頭等意思。與希伯來語同音同義,希伯來語的發音是Kela。
「疙瘩」,北京、河北一帶的話表示團塊的意思,希伯來語發音是Qaneh,同音同義。
「窟」、「窟窿」,在中國北方是洞眼、洞穴、山洞之意,希伯來語同音同義,發音是Chowr。
「戲」,遊戲、戲耍之意,希伯來語的發音是Shiyr,意思是唱、演唱的意思。
類似中國北方話與希伯來語同音同義還有很多、很多詞彙,而且在歷史長河中,很多詞彙出現了符合與疊加,形成了意思或發音的改變。
比如,北京話中「丫的」,表 示你、你們的人稱代詞,其實希伯來語的發音是Yad,意思完全一樣。
只是現代北京話中的「丫的」已經是罵人的話了,這就是歷史與時間的扭曲了。
北京話中有希伯來語?有趣的比較
比如「得吧」,在北京話中是「說話」的意思,與古希伯來語同音同義,希伯來語發音 Dabar。
再比如,北京人常吃的「燒麥」,這也是羯胡人遷徙到中國北方發明的食品,與希伯來語同音同義,希伯來語的發音是Shemesh。
北京人常稱村 莊為「屯厄」(帶兒化音),而在《舊約聖經》中的希伯來語,也是如此稱呼村莊的,希伯來語的發音是Duwr。
其實,北京兒化音的形成原因,就與很多外來詞 彙有關。
類似的還有很多,例如:
「俺」,這個詞是北京和北方人「我」、「我的」意思,希伯來語也是同音同義,希伯來語的發音An和Ammi。
「丫頭」,「鴨蛋兒」,是北京人或北方人形容小女孩的,希伯來語同樣是這個意思,希伯來語的發音是Yaldah。
「別介」,是北京人表達否定的說法,相當於英語中No的意思,希伯來的發音是Bil-tsi與希伯來語同音同義。
「甭」,這個詞彙是北京表示否定之意,《舊約聖經》中的希伯來語同樣也是這個意思,發音是Bal。
「胡同」,這個北京最常見的地方,很多人以為是來自蒙古語,其實不對。實際也是希伯來語,發音是Hoot,同樣也是小街道的意思。
「捻兒」,在北京話中是燈芯的意思,在希伯來語中的意思是一樣的,也是照亮、照明以及光明有關的東西。希伯來語的發音是Ryn,Niyr。實際上我認為北京著名的兒化音,就是外來語的明顯印跡。
「坷垃」,表示硬土塊和石頭等意思。與希伯來語同音同義,希伯來語的發音是Kela。
「疙瘩」,北京、河北一帶的話表示團塊的意思,希伯來語發音是Qaneh,同音同義。
「窟」、「窟窿」,在中國北方是洞眼、洞穴、山洞之意,希伯來語同音同義,發音是Chowr。
「戲」,遊戲、戲耍之意,希伯來語的發音是Shiyr,意思是唱、演唱的意思。
類似中國北方話與希伯來語同音同義還有很多、很多詞彙,而且在歷史長河中,很多詞彙出現了符合與疊加,形成了意思或發音的改變。
比如,北京話中「丫的」,表 示你、你們的人稱代詞,其實希伯來語的發音是Yad,意思完全一樣。
只是現代北京話中的「丫的」已經是罵人的話了,這就是歷史與時間的扭曲了。
2014年10月1日 星期三
畫面能夠依資料內容來變更文字顏色、樣式
http://4shiun.blogspot.tw/2013/02/blog-post.html
TIPTOP的畫面設計比較偏向 TEXT-Mode ,所以會以比較單調樣式來呈現,
現在應該沒有人在用這種方式了吧,都是用 GUI 的方式來使用。
這樣就可以添加一些色彩、底線、粗體,來增加使用者操作上資料的辦識能力。
依 4js 的說明,在 DISPLAY 可以加上屬性,如下:
1. BLACK, BLUE, CYAN, GREEN, MAGENTA, RED, WHITE, YELLOW – 顯示顏色
2. BOLD, DIM, NORMAL – 顯示字體樣式
3. REVERSE, BLINK, UNDERLINE – 顯示文字的屬性
屬性的字面上的意思就能知道用途了,多重屬性時只要加上逗號來區隔,就不多加說明了。
例如我們想要 sfb01 這個欄位在某些情況下顯示藍色時,只要加判斷再加上 ATTRIBUTE,
例:
IF g_sfb01.sfb04 = '8' THEN
DISPLAY BY NAME g_sfb01.sfb01 ATTRIBUTE(BLUE)
ELSE
DISPLAY BY NAME g_sfb01.sfb01 ATTRIBUTE(BLACK)
END IF
鼎新也有提供 lib 的函式來改變顏色:
CALL cl_set_comp_font_color("sfb01,sfb02","RED")
但是如果是單身的話會用 DISPLAY ARRAY 就只能所有單身全部的顏色都變一樣,
要改用 DIALOG.setCellAttributes 的方式來顯示欄位的屬性。
例:
要先定義單身有那些是要動態變更欄位屬性的陣列變數:
DEFINE g_gen_attr DYNAMIC ARRAY OF RECORD
gen01 STRING,
gen02 STRING,
gen03 STRING
END RECORD
記得要先做 g_gen_attr.clear()。
在 fill() 函數時 FOREACH 的時候判斷:
IF g_gen[g_cnt].gen03 IS NULL TEHN
LET g_gen_attr[g_cnt].gen01 = 'MAGENTA REVERSE'
ELSE
LET g_gen_attr[g_cnt].gen01 = ''
END IF
再來就是 DISPLAY ARRAY 顯示的時候依定義好的屬性來顯示:
BEFORE DISPLAY
CALL cl_navigator_setting( g_curs_index, g_row_count )
CALL DIALOG.setCellAttributes(g_gen_attr) #加上這一句
畫面能夠依資料內容來變更文字顏色、樣式
現在應該沒有人在用這種方式了吧,都是用 GUI 的方式來使用。
這樣就可以添加一些色彩、底線、粗體,來增加使用者操作上資料的辦識能力。
依 4js 的說明,在 DISPLAY 可以加上屬性,如下:
1. BLACK, BLUE, CYAN, GREEN, MAGENTA, RED, WHITE, YELLOW – 顯示顏色
2. BOLD, DIM, NORMAL – 顯示字體樣式
3. REVERSE, BLINK, UNDERLINE – 顯示文字的屬性
屬性的字面上的意思就能知道用途了,多重屬性時只要加上逗號來區隔,就不多加說明了。
例如我們想要 sfb01 這個欄位在某些情況下顯示藍色時,只要加判斷再加上 ATTRIBUTE,
例:
IF g_sfb01.sfb04 = '8' THEN
DISPLAY BY NAME g_sfb01.sfb01 ATTRIBUTE(BLUE)
ELSE
DISPLAY BY NAME g_sfb01.sfb01 ATTRIBUTE(BLACK)
END IF
鼎新也有提供 lib 的函式來改變顏色:
CALL cl_set_comp_font_color("sfb01,sfb02","RED")
但是如果是單身的話會用 DISPLAY ARRAY 就只能所有單身全部的顏色都變一樣,
要改用 DIALOG.setCellAttributes 的方式來顯示欄位的屬性。
例:
要先定義單身有那些是要動態變更欄位屬性的陣列變數:
DEFINE g_gen_attr DYNAMIC ARRAY OF RECORD
gen01 STRING,
gen02 STRING,
gen03 STRING
END RECORD
記得要先做 g_gen_attr.clear()。
在 fill() 函數時 FOREACH 的時候判斷:
IF g_gen[g_cnt].gen03 IS NULL TEHN
LET g_gen_attr[g_cnt].gen01 = 'MAGENTA REVERSE'
ELSE
LET g_gen_attr[g_cnt].gen01 = ''
END IF
再來就是 DISPLAY ARRAY 顯示的時候依定義好的屬性來顯示:
BEFORE DISPLAY
CALL cl_navigator_setting( g_curs_index, g_row_count )
CALL DIALOG.setCellAttributes(g_gen_attr) #加上這一句
如何直覺式知道 axmi221 其他地址和客戶聯絡人有沒有內容 ?
http://4shiun.blogspot.tw/2014_08_01_archive.html
過去的文章可以用一個圖示就知道有沒有附件的資料-增加相關文件圖示,
方便查詢時就不需要每個都按相關文件去查看。
那如果是 Action 呢? 能不能知道 Action 串連的程式有沒有資料。
舉例: axmi221 客戶基本資料能不能直覺式就看出來有沒有其他地址和客戶聯絡人呢?
其實也是可以的,在 Action 可以動態加上 image 的圖示就可以了,
沒辦法改變 Action 的文字顏色或是背景的顏色。
Genero 已經有預設一些圖示提供給 TIPTOP 可以直接宣告來使用,
想要看有那些圖示,請參考:/u1/genero/gas/pic/ 資料夾的 png 檔。

再來就是依範例加上此段程式就可以啦。有資料的時候就會顯示圖示,沒有資料的話就不會顯示圖示。
這樣就方便使用者可以很直覺的知道有沒有輸入資料了。
# 有客户其他地址時顯示符號
LET l_cnt = 0
SELECT COUNT(*) INTO l_cnt FROM ocd_file WHERE ocd01 = g_occ.occ01
IF l_cnt > 0 THEN
LET w = ui.Window.getCurrent()
LET n = w.findNode("MenuAction","customer_address1")
CALL n.setAttribute("image","information")
ELSE
LET w = ui.Window.getCurrent()
LET n = w.findNode("MenuAction","customer_address1")
CALL n.setAttribute("image","")
END IF
# 有客户聯絡人時顯示符號
LET l_cnt = 0
SELECT COUNT(*) INTO l_cnt FROM oce_file WHERE oce01 = g_occ.occ01
IF l_cnt > 0 THEN
LET w = ui.Window.getCurrent()
LET n = w.findNode("MenuAction","customer_contact")
CALL n.setAttribute("image","information")
ELSE
LET w = ui.Window.getCurrent()
LET n = w.findNode("MenuAction","customer_contact")
CALL n.setAttribute("image","")
END IF
如何直覺式知道 axmi221 其他地址和客戶聯絡人有沒有內容 ?
方便查詢時就不需要每個都按相關文件去查看。
那如果是 Action 呢? 能不能知道 Action 串連的程式有沒有資料。
舉例: axmi221 客戶基本資料能不能直覺式就看出來有沒有其他地址和客戶聯絡人呢?
其實也是可以的,在 Action 可以動態加上 image 的圖示就可以了,
沒辦法改變 Action 的文字顏色或是背景的顏色。
Genero 已經有預設一些圖示提供給 TIPTOP 可以直接宣告來使用,
想要看有那些圖示,請參考:/u1/genero/gas/pic/ 資料夾的 png 檔。
再來就是依範例加上此段程式就可以啦。有資料的時候就會顯示圖示,沒有資料的話就不會顯示圖示。
這樣就方便使用者可以很直覺的知道有沒有輸入資料了。
# 有客户其他地址時顯示符號
LET l_cnt = 0
SELECT COUNT(*) INTO l_cnt FROM ocd_file WHERE ocd01 = g_occ.occ01
IF l_cnt > 0 THEN
LET w = ui.Window.getCurrent()
LET n = w.findNode("MenuAction","customer_address1")
CALL n.setAttribute("image","information")
ELSE
LET w = ui.Window.getCurrent()
LET n = w.findNode("MenuAction","customer_address1")
CALL n.setAttribute("image","")
END IF
# 有客户聯絡人時顯示符號
LET l_cnt = 0
SELECT COUNT(*) INTO l_cnt FROM oce_file WHERE oce01 = g_occ.occ01
IF l_cnt > 0 THEN
LET w = ui.Window.getCurrent()
LET n = w.findNode("MenuAction","customer_contact")
CALL n.setAttribute("image","information")
ELSE
LET w = ui.Window.getCurrent()
LET n = w.findNode("MenuAction","customer_contact")
CALL n.setAttribute("image","")
END IF
2014年9月30日 星期二
perl 利用 regular expression and pack/unpack 比對 特殊字元▲
use Spreadsheet::ParseExcel;
...
my $parser = Spreadsheet::ParseExcel->new();
...
excel 裡面有一個特殊字元 ▲
經過
perl
$char = unpack("H*","▲");
print $char;
__END__
解析,其16進位為 e296b2
所以用以下code判斷
353 my $tmp = ($sheet->get_cell($i,0))->value();
354 my $tmp2 = unpack("H*",$tmp) if $tmp;
355 $tc_imf09 = "危險品" if ($tmp2 =~ /e296b2/);
...
my $parser = Spreadsheet::ParseExcel->new();
...
excel 裡面有一個特殊字元 ▲
經過
perl
$char = unpack("H*","▲");
print $char;
__END__
解析,其16進位為 e296b2
所以用以下code判斷
353 my $tmp = ($sheet->get_cell($i,0))->value();
354 my $tmp2 = unpack("H*",$tmp) if $tmp;
355 $tc_imf09 = "危險品" if ($tmp2 =~ /e296b2/);
2014年9月18日 星期四
insert Oracle with special characters in Perl
https://community.oracle.com/thread/2203961?tstart=0 use Encode;
...
$working = encode("utf8", "µmol/L");2014年9月17日 星期三
Perl 讀取 Excel (二)
http://fecbob.pixnet.net/blog/post/38617415-%E5%9C%A8perl%E4%B8%AD%E8%AE%80%E5%AF%ABexcel%E8%A1%A8
讀寫Excel的元件需要另外安裝,指令如下:
perl -MCPAN -e shell -> install Spreadsheet::WriteExcel
perl -MCPAN -e shell -> install Spreadsheet::ParseExcel
Python代碼
#!/usr/bin/perl
use Spreadsheet::WriteExcel; #寫入Excel資料
use Spreadsheet::ParseExcel; #讀取Excel資料
# 讀取資料
# 使用: LoadStringsFromExcel(fileName);
sub LoadStringsFromExcel
{
my $parser = Spreadsheet::ParseExcel->new();
my $workbook = $parser->parse(@_[0]); #打開傳入的檔
my $TotalCount = 0;
if(!defined $workbook) #是否打開成功
{
print "Failed to open @_[0]\n";
die $parser->error(),".\n";
}
$Sheets_Count = $workbook->worksheet_count(); #有多少個Sheet
#依次訪問所有Sheet
for ($index=1;$index<=$Sheets_Count;$index++)
{
my $worksheet = $workbook->worksheet($index-1);
my $result;
if(!defined $worksheet) #讀取Sheet失敗
{
print "Could not get the worksheet \n";
last;
}
else
{
$result = LoadWordingsFromSheet($worksheet);
$TotalCount += $result;
}
}
printf "\nTotal found $TotalCount strings\n";
print "Finished!\n";
}
# 讀取Sheet中字串,由LoadStringsFromExcel呼叫
sub LoadWordingsFromSheet
{
my $sheet = $_[0]; #取得傳入的sheet
if(!defined $sheet)
{
die "Could not get argument!\n";
}
#得到Sheet中的最小行號及最大行號
my ($minRow,$maxRow) = $sheet->row_range();
print "Now, checking ",$sheet->get_name()," \n"; #列印Sheet的名稱
$count = 1;
#依次讀取每行資料中第一列的資料
for($i=$minRow;$i<=$maxRow;$i++)
{
#取到第一列的資料, get_cell(行號,列號)
$str = ($sheet->get_cell($i,0))->value();
$str = trim($str);
print $str,"\n";
$count++;
}
return $count;
}
sub trim { my $s = shift; $s =~ s/^\s+|\s+$//g; return $s };
#寫入Excel
#使用WriteDataToExcel(檔案名)
sub WriteDataToExcel
{
my $workbook = Spreadsheet::WriteExcel->new(@_[0]);#打開Excel檔
if(!defined $workbook) #是否打開成功
{
print "Failed to open @_[0]\n";
die $parser->error(),".\n";
}
my $worksheet = $workbook->add_worksheet(); #新建一個Sheet
if(!defined $sheet)
{
die "Cannot create new sheet!\n";
}
#寫入第一行標題 write(行號,列號,內容)
$worksheet->write(0,0,'ID');
$worksheet->write(0,1,'RULE');
#其它處理
}
使用Perl 讀取 Excel
使用Spreadsheet::ParseExcel
[root@tiptopap ~]# perl -MCPAN -e shell
cpan> get Spreadsheet::ParseExcel
cpan> install Spreadsheet::ParseExcel
cpan> test Spreadsheet::ParseExcel
http://tc.wangchao.net.cn/bbs/detail_1476947.html
Spreadsheet::WriteExcel 和 Spreadsheet::ParseExcel
在 2000 年,Takanori Kawai 和 John McNamara 編寫出了 Spreadsheet::WriteExcel 和 Spreadsheet::ParseExcel 模塊並將它們張貼在 CPAN 上,這兩個模塊使得在任何平台上從 Excel 文件抽取數據成爲可能(盡管不容易)。
正如我們在稍後將看到的,如果您正在使用 Windows,Win32::OLE 仍提供一個更簡單、更可靠的解決方案,並且 Spreadsheet::WriteExcel 模塊建議使用 Win32::OLE 來進行更強大的數據和工作表操縱。Win32::OLE 帶有 ActiveState Perl 工具箱,可以用來通過 OLE 驅動許多其它 Windows 應用程序。請注意,要使用此模塊,您仍需要在機器上安裝和注冊一個 Excel 引擎(通常隨 Excel 本身安裝)。
需要解析 Excel 數據的應用程序數以千計,但是這裏有幾個示例:將 Excel 導出到 CSV、與存儲在共享驅動器上的電子表格交互、將金融數據移至數據庫以便形成報告以及在不提供任何其他格式的情況下分析數據。
要演示這裏給出的示例,必須在您的系統上安裝 Perl 5.6.0。您的系統最好是最近(2000 年或以後)的主流 UNIX 安裝(Linux、Solaris 和 BSD)。雖然這些示例在以前版本的 Perl 和 UNXI 以及其他操作系統中也可以使用,但是您應該考慮到您將面對那些它們無法作爲練習發揮作用的情況。
Windows 示例:解析
本節僅適用于 Windows 機器。所有其它各節適用于 Linux。
在進行之前,請安裝 ActiveState Perl(這裏使用版本 628)或 ActiveState Komodo IDE 以編輯和調試 Perl。Komodo 爲家庭用戶提供一個免費許可證,您大概在幾分鍾之內就可以得到它。(有關下載站點,請參閱本文後面的參考資料。)
使 用 ActiveState PPM 軟件包管理器安裝 Spreadsheet::ParseExcel 和 Spreadsheet::WriteExcel 模塊是困難的。PPM 沒有曆史記錄,難以設置選項,幫助會滾出屏幕並且缺省方式是忽略相關性而安裝。您可以從命令行輸入“ppm”然後發出以下命令來調用 PPM:
清單 1:安裝 Excel 模塊的 PPM 命令
ppm install OLE::Storage_Lite
ppm install Spreadsheet::ParseExcel
ppm install Spreadsheet::WriteExcel
在這種情況下,該模塊的安裝將失敗,因爲 IO::Scalar 還不可用,因此,您可能想放棄 PPM 問題的查找,而轉向內置的 Win32::OLE 模塊。然而,在您閱讀本文時,ActiveState 可能已經發布了該問題的修正。
有了 ActiveState 的 Win32::OLE,您可以使用下面所列的代碼逐個單元地轉儲工作表:
下載 win32excel.pl
清單 2:win32excel.pl
#!/usr/bin/perl -w
use strict;
use Win32::OLE qw(in with);
use Win32::OLE::Const 'Microsoft Excel';
$Win32::OLE::Warn = 3;
# die on errors...
# get already active Excel application or open new
my $Excel = Win32::OLE-GetActiveObject('Excel.Application')
|| Win32::OLE-new('Excel.Application', 'Quit');
# open Excel file
my $Book = $Excel-Workbooks-Open("c:/komodo projects/test.xls");
# You can dynamically obtain the number of worksheets, rows, and columns
# through the Excel OLE interface.
Excel's Visual Basic Editor has more
# information on the Excel OLE interface.
Here we just use the first
# worksheet, rows 1 through 4 and columns 1 through 3.
# select worksheet number 1 (you can also select a worksheet by name)
my $Sheet = $Book-Worksheets(1);
foreach my $row (1..4)
{
foreach my $col (1..3)
{
# skip empty cells
next unless defined $Sheet-Cells($row,$col)-{'Value'};
# print out the contents of a cell
printf "At ($row, $col) the value is %s and the formula is %s\n",
$Sheet-Cells($row,$col)-{'Value'},
$Sheet-Cells($row,$col)-{'Formula'};
}
}
# clean up after ourselves
$Book-Close;
請注意,您可以用以下方式很輕松地爲單元分配值:
$sheet-Cells($row, $col)-{'Value'} = 1;
Linux 示例:解析
本節適用于 UNIX,特別適用于 Linux。沒有在 Windows 中測試它。
很難給出一個比 Spreadsheet::ParseExcel 模塊文檔中所提供的示例更好的 Linux 解析示例,因此我將演示那個示例,然後解釋其工作原理。
下載 parse-excel.pl
清單 3:parse-excel.pl
#!/usr/bin/perl -w
use strict;
use Spreadsheet::ParseExcel;
my $oExcel = new Spreadsheet::ParseExcel;
die "You must provide a filename to $0 to be parsed as an Excel file" unless @ARGV;
my $oBook = $oExcel-Parse($ARGV[0]);
my($iR, $iC, $oWkS, $oWkC);
print "FILE
:", $oBook-{File} , "\n";
print "COUNT :", $oBook-{SheetCount} , "\n";
print "AUTHOR:", $oBook-{Author} , "\n"
if defined $oBook-{Author};
for(my $iSheet=0; $iSheet {SheetCount} ; $iSheet++)
{
$oWkS = $oBook-{Worksheet}[$iSheet];
print "--------- SHEET:", $oWkS-{Name}, "\n";
for(my $iR = $oWkS-{MinRow} ;
defined $oWkS-{MaxRow} && $iR {MaxRow} ;
$iR++)
{
for(my $iC = $oWkS-{MinCol} ;
defined $oWkS-{MaxCol} && $iC {MaxCol} ;
$iC++)
{
$oWkC = $oWkS-{Cells}[$iR][$iC];
print "( $iR , $iC ) =", $oWkC-Value, "\n" if($oWkC);
}
}
}
此示例是用 Excel 97 測試的。如果它不能工作,則試著將它轉換成 Excel 97 格式。Spreadsheet::ParseExcel 的 perldoc 頁也聲稱了 Excel 95 和 2000 兼容性。
電子表格被解析成一個名爲 $oBook 的頂級對象。$oBook 具有輔助程序的特性,例如“File”、“SheetCount”和“Author”。 Spreadsheet::ParseExcel 的 perldoc 頁的工作簿一節中記載了這些特性。
該工作簿包含幾個工作表:通過使用工作簿 SheetCount 特性叠代它們。每個工作表都有一個 MinRow 和 MinCol 以及相應的 MaxRow 和 MaxCol 特性,它們可以用來確定該工作簿可以訪問的範圍。Spreadsheet::ParseExcel perldoc 頁的工作表一節中記載了這些特性。
可以通過 Cell 特性從工作表獲得單元;那就是清單 3 中獲得 $oWkC 對象的方式。Spreadsheet::ParseExcel 的 perldoc 頁的 Cell 一節中記載了 Cell 特性。根據文檔,似乎沒有一種方式能夠獲得特定單元中列出的公式。
Linux 示例:寫入
本節適用于 UNIX,特別適用于 Linux。沒有在 Windows 中測試它。
Spreadsheet::WriteExcel 在 Examples 目錄中帶有許多示例腳本,通常可以在 /usr/lib/perl5/site_perl/5.6.0/Spreadsheet/WriteExcel/examples 下找到這些腳本。它可能被安裝在其它各處;如果找不到那個目錄,請與您的本地 Perl 管理員聯系。
壞消息是 Spreadsheet::WriteExcel 無法用于寫入現有 Excel 文件。必須自己使用 Spreadsheet::ParseExcel 從現有 Excel 文件導入數據。好消息是 Spreadsheet::WriteExcel 與 Excel 5 直至 Excel 2000 兼容。
這裏有一個程序,它演示如何從一個 Excel 文件抽取、修改(所有數字都乘以 2)數據以及將數據寫入新的 Excel 文件。只保留數據,不保留格式和任何特性。公式被丟棄。
下載 excel-x2.pl
清單 4:excel-x2.pl
#!/usr/bin/perl -w
use strict;
use Spreadsheet::ParseExcel;
use Spreadsheet::WriteExcel;
use Data::Dumper;
# cobbled together from examples for the Spreadsheet::ParseExcel and
# Spreadsheet::WriteExcel modules
my $sourcename = shift @ARGV;
my $destname = shift @ARGV or die "invocation: $0 ";
my $source_excel = new Spreadsheet::ParseExcel;
my $source_book = $source_excel-Parse($sourcename)
or die "Could not open source Excel file $sourcename: $!";
my $storage_book;
foreach my $source_sheet_number (0 .. $source_book-{SheetCount}-1)
{
my $source_sheet = $source_book-{Worksheet}[$source_sheet_number];
print "--------- SHEET:", $source_sheet-{Name}, "\n";
# sanity checking on the source file: rows and columns should be sensible
next unless defined $source_sheet-{MaxRow};
next unless $source_sheet-{MinRow}
(王朝網路 wangchao.net.cn)
2014年9月8日 星期一
指定畫面單身資料匯出 Excel
http://4shiun.blogspot.tw/2013/01/excel.html
TIPTOP 提供一個的 Library 可以將畫面單身的資料匯出到 Excel ,
例如:CALL cl_export_to_excel(ui.Interface.getRootNode(),base.TypeInfo.create(g_sfq),'','')
但是有程式在視窗上是有二個單身,像是工單發料、工單退料、付款沖帳、收款沖帳…等,
或是有程式會開啟另一個視窗的明細資料,像出貨單的單價,應付帳款的多發票…等。
同一支程式會呼叫多個畫面或是有多單身的情況時,
用 cl_export_to_excel 就會發現,怎麼匯出到 Excel 的資料是對的,但是欄位的名稱是錯的。
造成匯出來就會不整齊,不會依序排好。
因為 ui.Interface.getRootNode() 都是抓第一個顯示的單身來當作匯出的資料陣列。
所以我們就要把 ui.Interface.getRootNode() 改成正確的 node (節點)。
TIPTOP 並非 MDI 視窗架構,所以一個 Windows 只會有一個 Form。
畫面的架構:
UserInterface
|--Windows
| |-- Form
| | |--Table
| |--Dialog
|--TopMenu
|--ToolBar
如下圖所示:
參考 4js 網站說明,提供 ui.window 的函數說明:
CLASS Method:
forName( name STRING ):回傳目前是否有開啟 name 視窗,並傳回位置
getCurrent():回傳目前的視窗位置
OBJECT Method:
findNode( t STRING, n STRING ):找尋類型為 t,且名稱為 n 的節點
createForm( n STRING ):開啟一個新的畫面,且傳回新畫面的位置
getForm():回傳目前畫面的位置
getNode():回傳目前節點的位置
setText( t STRING ) :設定視窗的標題名稱
getText():回傳視窗的標題名稱
setImage( n STRING ):設定視窗的 icon 圖示
getImage():回傳視窗的 icon 圖示
首先要先宣告二個變數:
DEFINE w ui.Window
DEFINE n om.DomNode
再來就是要取得目前的視窗和要匯出 Excel 的 Node:
如果是新的視窗來顯示的話,只要用 getNode 即可,
LET w = ui.Window.getCurrent()
LET n = w.getNode()
如果是多單身的視窗,就要告訴系統是那一個單身 Node:
LET w = ui.Window.getCurrent()
LET n = w.findNode("Table","s_sfs")
然後再修改 cl_export_to_excel 把 ui.Interface.getRootNode() 改為 n 就可以了,
CALL cl_export_to_excel(n,base.TypeInfo.create(g_sfs),'','')
***********************************************************************************************
在 Genero 中,您可以透過兩種主要方式來查看或檢查應用程式畫面的樹狀結構:在
Genero Studio 的設計階段,以及在應用程式執行階段的除錯模式。1. 在 Genero Studio 中 (設計階段)
當您在 Genero Studio 中編輯表單設計檔案 (.4fd 或 .per) 時,您可以直接在介面中看到其結構。
- 表單結構 (Form Structure) 檢視:在 Genero Studio 的 Form Designer 介面中,通常右側或下方會有一個稱為「Form Structure」或「結構」的面板。此面板會以樹狀結構列出表單中的所有容器(如
WINDOW,GROUP,HBOX,VBOX,GRID,FOLDER)和各個元件(如FIELD,BUTTON,TABLE,TREE等),顯示它們的階層關係。
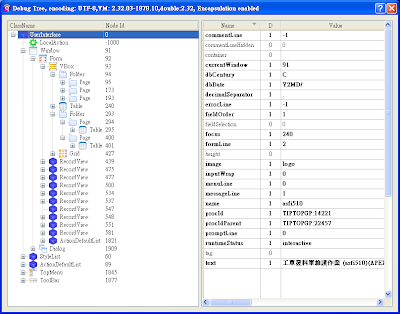
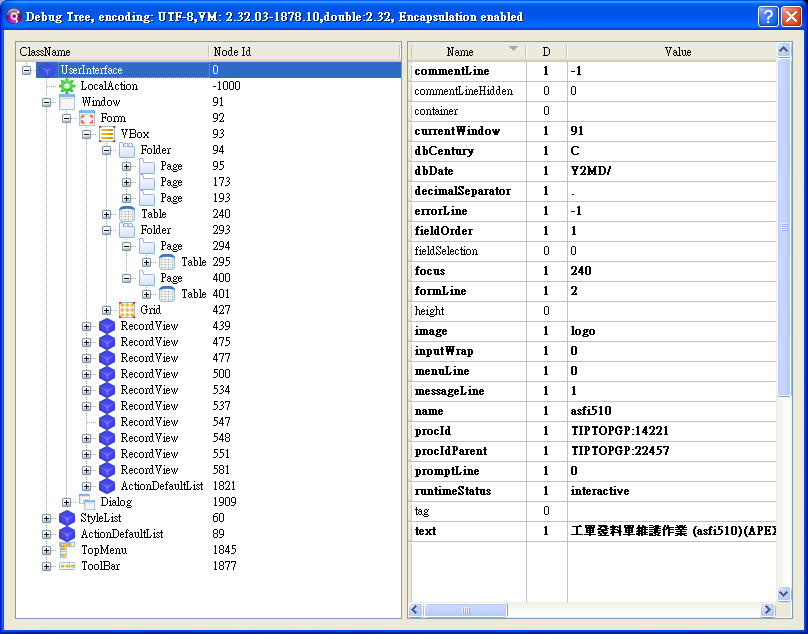
2. 在應用程式執行階段 (除錯模式) (這樣做,就可以看到類似以上截圖的的debug畫面)
當程式實際執行時,特別是使用
Genero Desktop Client (GDC) 或 Genero Web Client (GWC-JS)
時,您可以啟用特殊的除錯模式來查看實際生成的使用者介面抽象樹 (Abstract User Interface, AUI Tree)。
使用 Genero Desktop Client (GDC)
- 啟用除錯模式:您需要在啟動 GDC 時加入
-D選項,例如在執行應用程式的捷徑或命令列中加入此參數。 - 檢視 AUI Tree:在應用程式執行時,按下 Ctrl 鍵並同時滑鼠右鍵點擊您想檢查的畫面元件。這將會彈出一個「AUI Debug Tree」視窗,顯示該元件及其父層、子層的詳細樹狀結構和屬性。
使用 Genero Web Client (GWC-JS)
- 啟用除錯模式:需要確保 Genero Application Server (GAS) 運行在開發者模式 (development mode)。
- 檢視 AUI Tree:在瀏覽器中運行應用程式時,如果處於除錯模式,畫面右上角會出現一個「Debug Tools」圖示。點擊該圖示,會在新的瀏覽器分頁中開啟 GWC-JS 除錯工具頁面,您可以在其中看到 AUI Tree 的分頁。
這些工具對於除錯表單佈局、確認元件的父子關係以及了解 Genero 如何將 4GL/4FD 定義轉換為實際執行畫面非常有幫助。
2014年9月1日 星期一
古龍 名言錄
http://zh.wikiquote.org/zh-tw/%E5%8F%A4%E9%BE%99
不說話並不能算是絕對沉默,可怕的是那種絕對的沉默。
沉默有時也鋒利得像刀鋒一樣,有時甚至能殺人。 假如你曾經認為一個人是你的朋友,那麼這個人就永遠都是。 卑鄙的朋友,遠比正直的仇敵要可怕得多
- 人在江湖,真的身不由己啊!
- 還有人可以相思至少總比沒有人相思好。
- 驕傲本就是件愚蠢的事哪。
- 路本是同樣的路,只看你怎麼樣去走而已。
- 棋局就是人生,只要一著走錯,就非錯不可。
- 一個人的命運如何,本就是他自己造成的,所以正直勤勉的人,總是會有很運氣。
- 世上絕不會有那麼巧的事,也絕不會突然發生奇蹟,奇蹟本就都是人造成的。
- 艱苦的經驗,豈非總是能使人生更充足,更豐富。
- 要得到真正的快樂歡愉,豈非總是先付出艱苦的代價。
- 一個人的確不能太愛一個人,若是愛得太深,通常總是悲劇。
- 人生為什麼要有這麼多悲劇?
- 一個人內心深處,往往會有些秘密是自己都不知道的──也許不是真的不知道,只不過是不敢去把它發掘出來而已。
- 每個人都應該有自信,可是太自信了,也不是好事。
- 一個人最接近成功的時候,往往就是他最大意的時候。因為他認為成功已唾手可得,警戒之心就鬆了,就會變得自大起來。
- 一個人如果要做一件事,最好就不要問它的結局,只該問這件事是不是值得去做,在做這件事的時候是不是能夠讓別人快樂,自己振奮。
- 人總有人性,人性中總有善良的一面。
- 一個人若迷失了自己,那麼除了他自己之外,還有誰能找到他呢?
- 無論甚麼事都一樣,你要求是完美,就得先對它有一種狂熱的愛好。
- 自古以來,無論是誰想站在群山最高處,就得先學會如何忍受寂寞。
- 只要你肯去領略,就會發現人生本是多麼可愛,每個季節裏都有很多足以讓你忘記所有煩惱的賞心樂事。
- 一天中最黑暗的時候,也正是最接近光明的時候。人生也一樣。只要你能把這段艱苦黑暗時光挨過去,你的生命立刻就會充滿了光明和希望。
- 一個人只要活在世界上,就一定要受到某種約束。假如每個人都把自己想做的事做了出來,這世界還成甚麼樣子?
- 天網恢恢,疏而不漏。冥冥之中竟彷彿真的有種神秘力量,在主宰著人類的命運,絕沒有任何一個應該受懲罰的人,能逃過「它」的制裁。
- 黃金般的童年,甜蜜的往事,就連往日的痛苦,現在都已變得很甜蜜。原來生命竟是如此可愛,人們為什麼偏偏是要等到垂死時才珍惜?
- 能死在光明中,至少總比永遠活在黑暗中好得多。
- 一個人之所以能夠成功,就因為他往往能夠憑著一股超人的意志力和求生能力,超越他自己體能的極限。
- 一個人恐懼到了極點時,全身反而會莫名其妙的輕鬆。
- 只要是人,就有痛苦,祇是你有沒有勇氣去克服它而已,如果你有這種勇氣,它就會變成一種巨大的力量,否則,你祇有終生被它踐踏奴役。
- 一個勇者和一個懦夫之間最大的差異,那便是勇者的勇氣除了在必要的時候,永遠不會在平時顯露,而懦夫的勇氣卻在最需要勇氣的時候,反而消失了
- 勝利是絕沒有僥倖的,你要得勝,就一定要付出代價。
- 世界上的事情,若是有人把你推到再不能不幹的地步上,那此事你千萬幹不得——這裡可以肯定說是懷著你不知道的某種目的。
- 一個人在自我慚愧不安時,往往就會想去傷害別的人。
- 世上絕沒有任何事,能比被人逼著你作全無把握的決定更可怕!
- 祇有看不見的危險,才是最可怕的。
- 就算別人對你是一種阿諛或是高估,你也以為總比低估你好些。
- 愚我一次,其錯在人。若是能同樣佯騙我兩次,就是我自己的錯了。
- 眼睛可以傳神,也能泄露秘密。
- 有時不用眼睛而用腦子就能知道一些相當秘密的事。
不說話並不能算是絕對沉默,可怕的是那種絕對的沉默。
沉默有時也鋒利得像刀鋒一樣,有時甚至能殺人。 假如你曾經認為一個人是你的朋友,那麼這個人就永遠都是。 卑鄙的朋友,遠比正直的仇敵要可怕得多
- 有的人與人之間,就像是流星一般,縱然是一瞬間的相遇,也會迸發出令人眩目的火花。
- 一個人既能損人也要能被損才是真本事,就和武功一樣,能打人也要經得起挨揍才是真功夫。
- 等待是一種折磨,尤其這等待不知要什麼時候結束。
- 人臉上的表情在賭場裡可說全看得到:貪婪、奸詐、自私、懊悔、悔恨、痛苦。
- 越有趣的事越不能做得太多,否則就會變成很無趣了。
- 一個人習慣,往往是別人都知道,而自己卻是唯一不知道的人。
- 再見的意思往往也是最好不要再見。
- 當一個人不肯承認他害怕的時候,也就是怕得要命的時候。
- 一個人心裡的秘密如果是絕不能對人說出來的,就會變成種痛苦,變成種壓力。
- 能夠把心裡不能對人說的話說出來,就算死,也死得痛快。
- 好管閒事的人通常也都是不怕麻煩的人。
- 外表越凶的人,內心一定越懦弱。
- 人的意念,都是在一剎那間決定的,恆古以來,又有誰能預先知道自己要做什麼呢?在下一刻會做出什麼樣的舉動?
- 一個人之所以能活下去,也許就因為永遠有個明天。
- 黑暗無論多麼深沉,光明遲早還是要到來的。正如睡眠無論多麼甜蜜,也遲早有清醒的時候。
- 智慧豈非也像是刀一樣,受的折磨越多,就被磨得越鋒利。
- 光明也正如黑暗一樣,總是忽然而來,誰也不知道它什麼時候會來,但是你一定要有信心,一定要相信它遲早總會來的。
- 星光比家鄉更遠,可是星光看得見,家鄉呢?
- 自古以來,黑暗豈非就是恐懼的根源?
- 每個人都有自己的命運,如果太輝煌,就可能較短促;你願意做顆流星,還是做個蠟燭?流星的光芒雖短暫,可是那種無比的輝煌和美麗,又豈是千萬根蠟燭所能比得上的?
- 一個人只要求得心裡的平衡,無論犧牲什麼,都是值得的。
- 一個人心裡若不平靜,活著太痛苦了。
- 平時靜若處子,動時必若脫免;平時若是不發,發時必定驚人
- 一個人自己做錯了事,卻將錯誤發生的原因歸咎到別人身上,自己心裡非但沒有悔疚反而充滿了仇恨,反而要去對別人報復。這種行為本來就是人類最原始的弱點之一。
- 一個人的內心如果充滿了自卑,往往就會變成一個最驕傲的人。
- 一個真正的聰明人,絕不會低估自己的敵人,卻希望敵人低估他。
- 一個字或者一句話,往往就能把一個人騙得團團轉。
- 人類的思想就是這樣難以控制,一旦想到,再也驅除不了。
- 最使人絕望的就是自己厭惡自己。
- 一個人臨死的時候,往往也就是他一生中最清醒的時候。
- 真正聰明的人,永遠不會將別人當做獃子。因為將別人當做獃子的人,到最後總是往往會發現,真正的獃子不是別人,是自己。
- 一個人心裡越恐懼時,說話的聲音往往就越大。
- 沒有人應該受侮辱,也沒有人有權侮辱別人。
- 美,只不過是一瞬間的感覺,祇有真實才是永恆的。
- 我只要能把握住那一剎間的美就已足夠,永恆的事且留待予永恆,我根本不必理會。
- 世上最難瞭解的,就是人心和人性。人性的復雜,遠在天下任何一種武功之上。但你若不能瞭解人性,武功也就永遠無法達到巔峰,因為無論什麼事,都是和人性息息相關的,武功也不例外。
- 有時你甚至明知別人在騙你,卻還是寧願被騙。因為你覺得只要有一個人對你說的是真話,你犧牲的代價就已值得。
- 一個人若是太聰明了,知道的事太多,也許慢慢就會變成個瘋子。因為到了那種時候,他就會覺得做了瘋子就會變得快樂些,所以有些人最大的痛苦就是他明明想做瘋子,卻做不到。
- 世上大多數人都有這麼一張面具的,平時雖然看不到它,但到了必要時,就會將這張面具戴起來。有人是為了要隱藏自己的悲哀;有人是為了要隱藏自己的憤怒;有人是逼不得已,不得不以笑臉迷人;有的人為了要叫別人怕他。也有人是為了要隱藏自己的恐懼!
- 大多數人都有幾張不同的臉,他們若要變臉時,就好像戲子在換面具,甚至比換面具還要簡單。面具換得多了,漸漸就會將忘記自己本來是什麼樣的一張臉。面具戴得久了,就再也不願拿下來。因為他們發覺,面具越多,吃的虧就越少。
- 一個人若是總不為自己著想,活著也未免太可憐了。但是一個人若總是為自己著想,活著也實在無趣得很。
- 一天中最黑暗的時候,也正是最接近光明的時候。人生也一樣,只要你能把這段艱苦黑暗的時光挨過去,你的生命立刻就會充滿了光明和希望。
- 最後的一道陽光,總是最輝煌美麗的——有時生命也是如此。
- 別無選擇!無可奈何!人生中最悲慘的境界不是生離,不是失望,不是挫敗。
- 人生中最悲慘的境界,就是到了這種無可奈何、別無選擇的時候。
- 人生在世,不幸的事情雖然不少,但當運氣來臨的時候,就算關上大門也是一樣阻攔不住的。
- 這個世界上,這個人生,再也沒有比「想」更不快樂的事了,從古到今,從今到外,從死到活,都沒有。因為你想的事,通常都是你絕對做不到的。你日日夜夜的去想,想得要死要活,想得死去活來,想得滿地亂爬,想到快要痴了,你能想得到嗎?哈哈。
- 有些人縱然還沒有死,也等於是個死人。也有些雖然真的死了,卻永遠是活著的,活在人們心裡。
- 沒有必要時,他從不說謊——所以他說的謊才特別有效。
- 說謊最初的動機只不過是保護自己,一個人要說過很多次慌之後,才懂得如何用謊話來欺騙別人。
- 只道無情卻有情,情到濃時情轉薄。
- 多情自古空餘恨。不幸的是,一個人往往會偏偏去愛一個不值得愛的人,因為情感本就如一匹脫韁的野馬,誰也無法控制,誰都無可奈何。這本也是人類最深邃的悲哀之一。也正因如此,所以人世間永遠不斷有悲劇演出。
- 你將一個人思念的次數少了些時,並不表示你已忘了他,只不過是因為這相思已入骨。
- 盡量想法子讓別人低估你,但絕不要低估了你的敵人。
- 高手相爭祇有第一擊才是真正可以致命的一擊。一擊之後,盛氣已衰,自信之心也必將減弱,再擊就更難出手。
- 無論多聰明的人,心裡若有些畏懼,也會變笨的。所以你若想擊倒一個人,最好的辦法,就是讓他自己心裡先覺得恐懼,那麼用不著你出手,他自己就先已將自己擊倒。
- 一個人若已連自己都輕視自己,又怎能期望別人看重你。
- 武器是否可怕,主要得看它是在什麼人手裡。
- 高手對招,武功強弱固然是勝負的最大關鍵,但出手時的判斷是否正確,更是致命的因素。
- 以牙還牙,以血還血,這本就是江湖中最古老的規律。
- 卑鄙的計劃,往往也最容易成功。
- 能後發制人的,絕對比先發制人更可怕。
- 不要命的人,就是最可怕的人,不要命的武功,就是最可怕的武功。
- 古往今來,真正的武林高手,都是特立獨行、不受影響的人,一個人若連自己獨特的個性都沒有,又怎麼能練得出獨特的武功來?
- 懂得用刀殺人,並不困難,要懂得如何用刀救人,才是件困難的事。
- 一件兵器的真正價值,並不在它的本身,而在於它做的事。
- 看不見的刀,才是最可怕的刀。能令人看不出他真正面目的人,才是最可怕的人。
- 可以嚇死人的刀,通常都是看不見的刀。因為等你看見它時,就已太遲了。*
- 真正偉大的武功,並不僅僅是用聰明和苦功就能練出來的。
- 你一定先得有一顆偉大的心,才能練得真正偉大的武功。
- 劍是優雅的,是屬於貴族的,刀卻是普遍化的,平民化的。有關劍的聯想,往往是大宮廷裡,在深山裡,在白雲間。刀卻是和人類的生活息息相關的。奇怪的是,在人們的心目中,刀遠比劍更殘酷更慘烈更兇悍更野蠻更剛勇。*
- 讓人看不懂的招式,總是讓人不能不佩服的。
- 武者碰上了對手,就如同一般人尋到了知音是同樣的道理,因此在未卜生死之下,也或多或少的有種莫名的喜悅和興奮。
- 你若愛過一個人,恨他時才會恨得更深。
- 你心裡若已沒有愛,祇有仇恨,地獄就在你的心裡,你自己也已在地獄。
- 仇恨就像債務一樣,你恨別人時,就等於你自己欠下了一筆債,你心裡的仇恨越多,那麼你活在這世上,就永遠不會再有快樂的一天。
- 仇恨,本是種原始的,單純的情感。
- 仇恨是後天的,所以每個人都可以會恨錯,祇有愛才是永遠不會錯的。**
- 仇恨所能帶給一個人的,祇有痛苦和毀滅,愛才是永恆的。
- 仇恨!有時甚至連愛的力量都比不上仇恨!
- 仇恨和愛不一樣,仇恨並不是天生的。
- 仇恨本不是天生的,但仇恨若已在你心裡生了恨,世上就絕沒有任何力量能拔掉。
- 仇恨並不是種絕對的感情,仇恨的意識中,有時還包括了瞭解與尊敬。只可惜可愛的仇人不多,值得尊敬的仇人更少。
- 嫉妒與懷恨乃是世上最強烈的情感,尤其是在女子心中,更遠比愛心強烈得多。女子與女子間的嫉妒與懷恨,是永遠不會消失的。女子若是恨上另一個女子,必定恨上一生。
- 愛和恨最大的不同,是愛能使人憧憬未來,能使人對未來充滿希望。恨卻祇有使人想到過去那些痛苦的往事。
- 常言道,愛之越深,恨之越切。愛之深時,恨不得將兩人揉碎,合成一個,恨之切時,卻又恨不得將他碎屍萬段,銼骨揚灰。
- 恨與愛之間的距離,本僅相隔一線,愛得越深,恨得也就更強烈。
- 對於一個憎恨自己的人越表現得不在乎,往往就越使那個人憤怒。
- 就算敗,也要在敗中求勝。永不妥協,永不退讓一寸一分。 每個人一生中都要死一次的,但是有些人卻可以一生永遠不敗。
- 劍不是用來在背後殺人的,若是背後傷人,就不配用劍。 制敵取勝的武功也有很多種,有的以「氣」勝,有的以「力」勝,有的以「勢」勝,有的以「巧」勝。
- 一個人成名的一戰,通常也是他傷心的一戰,一戰功成,心 傷如死。在他以後活著的日子裡,有時甚至會希望在那一 戰里死的不是他的仇敵而是他。
- 搶就是不搶,不搶就是搶,後發制人,以靜制動,劍法的精義,已盡在其中。
- 世上有很多事,並不是武功可以解決的。人所以為萬物之靈,只因為他的智慧,並不是因為他的力氣,若論力氣,連 匹驢子都要比人強得多。
- 你若不得不懷疑一個你所最親近信賴的人,那實在是件痛苦的事。
- 痛苦本就可以刺激人的神經,令人的反應敏銳,也可以激發人的潛力——就算是一匹馬,當你鞭打它、令它覺得痛苦時,它也會跑得快些。負了傷的野獸也通常都比平時更兇猛!
- 人類最大的痛苦,也許就是永遠無法控制自己的思想。你若拚命想去回憶過去那些有趣的事情,但想到的偏總是那些辛酸和痛苦,那時你心裡就會覺得好像有根針在刺著。
- 一個人若看到別人比他更痛苦,他自己的痛苦就會減輕。
- 一個完全沒有痛苦的人,又怎能真正領略到歡樂的滋味。
- 一個人在真正痛苦時,非但已不再有拒絕的力量和尊嚴,也已不再的拒絕的勇氣。
- 人類最大的痛苦,就是心裡總是會想起一些不該想、也不願去想的事。
- 祇有真正無情的人,才沒有痛苦。
- 沒有表情時就是一種最痛苦的表情。
- 你祇有在真正愛上一個人的時候,才會有真正的痛苦。
- 只要你真正愛過,痛苦也是值得的。
- 在歡樂的地方,為什麼不能有痛苦的往事?
- 若沒有歡樂,哪裡來的痛苦?
- 痛苦與歡樂的距離,豈非本就在一線之間?
- 人心裡的痛苦,有時正像是腐爛的傷口一樣,你越不去動它,它爛得越深,你若狠狠給它一刀,讓它流膿流血,它反而就不定會收口。
- 真正的痛苦,反而不會讓人有痛苦的感覺。
- 這世上除了仇恨之外,還有一種比仇恨更可怕的感情——痛苦。
- 仇恨令他想毀滅的,只不過是他的仇人,但這種感情使得他想毀滅自己,想毀滅整個世界。
- 人之所以會有痛苦,那是因為人類是有情感的動物。
- 你祇有在真正愛上一個人的時候,才會有真正的痛苦。——這本來就是人類最大的悲哀之一。
- 他心中雖有悲哀,卻不願讓人也來負擔他的悲哀的痛苦——悲哀,永遠只適於獨自咀嚼的。
- 死,並不痛苦,痛苦的是等死的時候。
- 有些人也許真不知道自己是為了什麼而活著的,但還有些更可憐,他們甚至不知道自己是為了什麼而死的。
- 一個人做的事若都已在別人意料之中,他活著豈非也和死了差不多。
- 一個病重的人,是不是能活下去,至少有一半要看他自己是不是想活下去。
- 他無視成敗,蔑視死亡,更看不起世上的虛名與財富,可是,他無法逃避隱藏在自己心底深處的情感。他有無畏的勇氣,面對一切,他有鋒利的長劍,縱橫天下,可是……他斬不斷心裡的情絲。
- 自己不想死的人,通常也不想要別人死。這句話的另一方面也同樣正確。
- 你若想殺人,就得准備著被殺!
- 死亡,是公平的。在死亡面前,最偉大的人也會變得平凡。
- 死人能告訴你的事,也許比活人還多,而且也遠比活人可靠。
- 每個人遲早總會倒下。無論他生前多麼顯赫,等他倒下去時,看來也和別人完全一樣。
- 一個人在經歷了那許多「生」與「死」之後,心性的轉變絕非一般人可以想像。
- 生命竟是如此美好,一個人只要能活著,就已經是件值得慶幸的事。
- 不想死的人,也會死的。越不想死的人,有時候反而死得越快。
- 人類最神秘最殘酷而且最無可避免的敵人——死亡。
- 在人類的生命歷史中說來,死亡豈非都是一種沒有人能夠猜測得到的詭秘游戲。
- 人生的初戀祇有一次,就正如死亡也祇有一次一樣。
- 死,並不可怕,也不可悲。可怕的,悲哀的,是那些活在「生不如死」世界裡的一群人。(1月6日名言)
- 天下地下,再也沒有任何事比死更真實。
- 一個人活著並不是只為了自己,這世界上有很多人都是為了別人而活著的。如果你已經擔起了一付擔子,就不要隨便放下去。
- 死,多麼珍貴,祇有一次,絕無兩次。
- 生命本身的價值,卻是絕對平等的。誰也沒有權利認為自己的生命比別人的生命更有生存的價值,誰也沒有權利認為自己的生命遠比別人可貴。
- 語不驚人,不如不說;人不快活,死了算了。
- 活著的人,有時比死了的人還要可憐許多哩
2014年8月22日 星期五
SQLCA.SQLCODE 和 SQLCA.SQLERRD 和 STATUS 錯誤碼查詢
http://4shiun.blogspot.tw/2013/04/sqlcasqlcode-sqlcasqlerrd-status.html
要判斷程式在執行的時候,SQL 指令回傳結果正確與否,
在 4GL 就提供以下三個變數來使用:
SQLCA.SQLCODE:
執行 SQL 指令後,回傳 Informix 4GL 所表示的 Error Code。
SQLCA.SQLERRD:
SQLERRD[1]~SQLERRD[6],SQLERRD[2] 表示資料庫的錯誤訊息,SQLERRD[3] 表示執行的 row 數,其他特別功能使用就不參考。
STATUS:
通常會等於 SQLCA.SQLCODE ,但是多了系統的錯誤碼,所以執行 SQL 指令後系統 I/O 錯誤時就會顯示另一個錯誤碼。
程式執行時會回傳 SQLCA.SQLCODE 訊息碼,有以下三種情況:
0 表示執行成功。
100 表示成功但無資料,所以當 Update 沒有符合條件的資料可以用。
<0 負數表示有錯誤。
當訊息碼為負數時,表示為錯誤訊息,但是我們要怎麼查是什麼錯誤,
只要在命令環境下,執行 finderr 錯誤碼 就會出現錯誤的說明了。
例:執行 finderr -201 會出現以下訊息,英文應該大概上就知道什麼涵義:
-201 A syntax error has occurred.
This is the general error code for all types of mistakes in the form of an SQL statement. Look for missing or extra punctuation (for example, missing or extra commas, omission of parentheses around a subquery, etc.), keywords misspelled (for example VALEUS for VALUES), keywords misused (for example, SET in an INSERT statement, INTO in a subquery), keywords out of sequence (for example a condition of "value IS NOT" instead of "NOT value IS"), or the use of a reserved word as an identifier.
Note: Database servers that support "full NIST compliance" do not reserve any words; queries that work with these database servers may fail with error -201 when used with earlier implementations.
不過因為 SQLCA.SQLCODE 是 Informix 在 4GL 所規範出來的錯誤訊息,所以比較籠統的方式來呈現,舉例 -201
表示語法錯誤,但是沒辦法詳細說明錯誤在那,因此在 Debug 時可以用 SQLERRD[2] 就可以知道 Oracle 的 ORA
的錯誤碼,比較快速的知道語法是那裡的錯誤。
要得知 SQL 執行的筆數 SQLCA.SQLERRD[3] 就可以知道 SQL 指令所處理的筆數,在程式上也可以多加利用。
另外 Genero 還有提供二個指令,要注意不是變數型態的 SQL Error Code 而是指令,所以 Debug 不能顯示內容,
要先 LET 到變數或是 DISPLAY 才看的到,也是可以參考使用,功能和 SQLERRD[2] 相同。
SQLSTATE:
回傳 ANSI SQLSTATE 錯誤碼,現在應該所有商用資料庫都有支援 ANSI SQL。
SQLERRMESSAGE:
回傳資料庫的錯誤碼和錯誤的說明。
在 4GL 就提供以下三個變數來使用:
SQLCA.SQLCODE:
執行 SQL 指令後,回傳 Informix 4GL 所表示的 Error Code。
SQLCA.SQLERRD:
SQLERRD[1]~SQLERRD[6],SQLERRD[2] 表示資料庫的錯誤訊息,SQLERRD[3] 表示執行的 row 數,其他特別功能使用就不參考。
STATUS:
通常會等於 SQLCA.SQLCODE ,但是多了系統的錯誤碼,所以執行 SQL 指令後系統 I/O 錯誤時就會顯示另一個錯誤碼。
程式執行時會回傳 SQLCA.SQLCODE 訊息碼,有以下三種情況:
0 表示執行成功。
100 表示成功但無資料,所以當 Update 沒有符合條件的資料可以用。
<0 負數表示有錯誤。
當訊息碼為負數時,表示為錯誤訊息,但是我們要怎麼查是什麼錯誤,
只要在命令環境下,執行 finderr 錯誤碼 就會出現錯誤的說明了。
例:執行 finderr -201 會出現以下訊息,英文應該大概上就知道什麼涵義:
-201 A syntax error has occurred.
This is the general error code for all types of mistakes in the form of an SQL statement. Look for missing or extra punctuation (for example, missing or extra commas, omission of parentheses around a subquery, etc.), keywords misspelled (for example VALEUS for VALUES), keywords misused (for example, SET in an INSERT statement, INTO in a subquery), keywords out of sequence (for example a condition of "value IS NOT" instead of "NOT value IS"), or the use of a reserved word as an identifier.
Note: Database servers that support "full NIST compliance" do not reserve any words; queries that work with these database servers may fail with error -201 when used with earlier implementations.
要得知 SQL 執行的筆數 SQLCA.SQLERRD[3] 就可以知道 SQL 指令所處理的筆數,在程式上也可以多加利用。
另外 Genero 還有提供二個指令,要注意不是變數型態的 SQL Error Code 而是指令,所以 Debug 不能顯示內容,
要先 LET 到變數或是 DISPLAY 才看的到,也是可以參考使用,功能和 SQLERRD[2] 相同。
SQLSTATE:
回傳 ANSI SQLSTATE 錯誤碼,現在應該所有商用資料庫都有支援 ANSI SQL。
SQLERRMESSAGE:
回傳資料庫的錯誤碼和錯誤的說明。
2014年8月16日 星期六
2014年8月12日 星期二
vim search case-insensitive words 不分大小寫搜尋
http://untitled-c.blogspot.tw/2007/05/vim-search-case-insensitive-words.html
vim tip 再一發
取代的時候,要不分大小寫,可以用 s/aaa/bbb/i 。
那如果只是要搜尋,又要不分大小寫的時候呢?
直接在欲搜尋的字前面加上 \c 即可,
例如 /\cshrpoor ,會找到 Shrpoor、sHrpoor、shrpooR等等
vim tip 再一發
取代的時候,要不分大小寫,可以用 s/aaa/bbb/i 。
那如果只是要搜尋,又要不分大小寫的時候呢?
直接在欲搜尋的字前面加上 \c 即可,
例如 /\cshrpoor ,會找到 Shrpoor、sHrpoor、shrpooR等等
2014年8月10日 星期日
PHP error log
兩種寫法:
1.利用error_log
http://www.w3schools.com/php/func_error_log.asp
 Complete PHP Error Reference
This funtion returns TRUE on success, or FALSE on failure.
The mail received from the code above looks like this:
Complete PHP Error Reference
2.自製 function
http://richile0819.blogspot.tw/2012/07/php-write-log-phplog.html
function write_log($str,$status,$data_array) //傳入資料夾名 想寫近的狀態 資料
{
$textname = $str.date("Ymd").".txt"; //檔名 filename
$URL = "log/".$str."/"; //路徑 Path
if(!is_dir($URL)) // 路徑中的$str 資料夾是否存在 Folder exists in the path
mkdir($URL,0700);
$URL .= $textname; //完整路徑與檔名 The full path and filename
$time = $str.$status.":".date("H:i:s"); //時間 Time
$writ_tmp = '';
foreach ($data_array as $key => $value) //將陣列資料讀出 To read array data
{
$writ_tmp .= ",".$key."=".$value;
}
$write_data = $time.$writ_tmp."\n";
$fileopen = fopen($URL, "a+");
fseek($fileopen, 0);
fwrite($fileopen,$write_data); //寫資料進去 write data
fclose($fileopen);
}
1.利用error_log
http://www.w3schools.com/php/func_error_log.asp
PHP error_log() Function
Complete PHP Error Reference
Definition and Usage
The error_log() function sends an error to the server error log, a file or a remote destination.This funtion returns TRUE on success, or FALSE on failure.
Syntax
error_log(error,type,destination,headers)
| Parameter | Description |
|---|---|
| error | Required. The error message to log |
| type | Optional. Specifies the error log type. Possible log types:
|
| destination | Optional. Specifies where to send the error message. The value of this parameter depends on the value of the "type" parameter |
| headers | Optional. Only used if the "type" parameter is "1". Specifies additional headers, like From, Cc, and Bcc. The additional headers should be separated with a CRLF (\r\n). Note: When sending an email, it must contain a From header. This can be set with this parameter or in the php.ini file. |
Example
The following example sends an e-mail with a custom error:
<?php
$test=2;
if ($test>1)
{
error_log("A custom error has been triggered",
1,"someone@example.com","From: webmaster@example.com");
}
?>
$test=2;
if ($test>1)
{
error_log("A custom error has been triggered",
1,"someone@example.com","From: webmaster@example.com");
}
?>
A custom error has been triggered
Complete PHP Error Reference2.自製 function
http://richile0819.blogspot.tw/2012/07/php-write-log-phplog.html
function write_log($str,$status,$data_array) //傳入資料夾名 想寫近的狀態 資料
{
$textname = $str.date("Ymd").".txt"; //檔名 filename
$URL = "log/".$str."/"; //路徑 Path
if(!is_dir($URL)) // 路徑中的$str 資料夾是否存在 Folder exists in the path
mkdir($URL,0700);
$URL .= $textname; //完整路徑與檔名 The full path and filename
$time = $str.$status.":".date("H:i:s"); //時間 Time
$writ_tmp = '';
foreach ($data_array as $key => $value) //將陣列資料讀出 To read array data
{
$writ_tmp .= ",".$key."=".$value;
}
$write_data = $time.$writ_tmp."\n";
$fileopen = fopen($URL, "a+");
fseek($fileopen, 0);
fwrite($fileopen,$write_data); //寫資料進去 write data
fclose($fileopen);
}
2014年8月7日 星期四
如何在 64 位元的 Windows 7 中安裝 PLSQL DEVELOPER 8 和 Oracle 11g x64 Client
http://support.microsoft.com/kb/2585547/zh-tw
 問題的來龍去脈

問題的發生原因
整個問題是這樣的,PLSQL DEVELOPER 8 是沒辦法執行 64 位元的 OCI.DLL,可是 Win7 X64 又只能裝 64 位元 Oracle client X64。
變成要多下載一個 Oracle Instant client X32,將裡頭的 OCI.DLL 指定給 PLSQL DEVELOPER 8,再設定一些環境變數,才能正常執行。
變成要多下載一個 Oracle Instant client X32,將裡頭的 OCI.DLL 指定給 PLSQL DEVELOPER 8,再設定一些環境變數,才能正常執行。
問題的解決方法
以下是操作步驟:
- 先到 Oracle 官網下載 Oracle Database 11g Release 2 Client (11.2.0.1.0) for Microsoft Windows (x64) ,接者依照以下步驟安裝:
a. 執行 win64_11gR2_client\client\setup.exe 進行安裝,一開始有個黑色偵測畫面,等消失後進入安裝畫面。
b. 進入安裝畫面後,選您要安裝項目,這裡可以選【一般執行程式版本】安裝。
c. 【執行語言】用預設值:【繁體中文】、【英文】。
d. Oracle 基本目錄輸 入 D:\Oracl11_64。
e. 接下來續按【下一步】一直到【完成】。 - 下載 PLSQL Developer 8 ,並解壓縮到特定目錄。
- 到Oracle官網下載Instant Client for Microsoft Windows (32-bit),選 instantclient-basic-nt-11.2.0.2.0.zip,下載後解壓縮instantclient_11_2到目錄D:\Oracl11_32 。
- 進入【控制台】→【系統安全設定】→【系統】→【進階系統設定】,彈出以下視窗:
點選【環境變數】。
點使用者變數,點【編輯】進行修改。以下是要修改的環境變數 :
變數名稱:TNS_ADMIN
值: D:\Oracl11_64\product\11.2.0\client_1\network\admin
變數名稱:NLS_LANG
值:TRADITIONAL CHINESE_TAIWAN.ZHT16BIG5 這值可以使用SQLPlus查詢,操作如下:
a. 打開SQLPlus,輸入帳號:XX@DB字串,密碼:XXX。
b. 輸入SQL指令:select userenv(‘language’) from dual 。
變數名稱:PATH
值:加上 D:\Oracl11_32\instantclient_11_2,讓後面PLSQL Developer 8的 OCI Library設定能選到 oci.dll。 - 進入【PLSQL Developer 8】→【Tools】→【preference】,修改 connection 設定:
【Oracle_HOME】:指向 D:\Oracl11_32\instantclient_11_2。
【OCI】:點一下 OCI library 左邊黑框成綠框,指向 D:\Oracl11_32\instantclient_11_2\oci.dll 。 - 將 tnsnames.ora 複製到 D:\Oracl11_64\product\11.2.0\client_1\network\admin 路徑下。
- 重開 PLSQL Developer,就可以開始使用了。


2014年8月6日 星期三
VIM学习笔记 配色方案(Color Scheme)
http://yyq123.blogspot.tw/2011/02/vim-color-scheme.html

你也可以在Vim.org中,查找并下载喜欢的配色方案。你甚至可以下载Color Sampler Pack,然后从其中包含的100个最受欢迎配色方案里慢慢挑选。
将下载的配色方案文件name.vim,放入$VIMRUNTIME/colors目录中;然后执行以下命令,就可以应用这个配色方案了:

如果对现在的语法配色不满意,可以使用以下命令进行修改:
其中group是指语法元素,例如:
而definition是指具体定义。例如以下命令,将定义黄底黑字的终端:
在命令中没有指定的参数,将保持其原有的定义。例如以下命令,将背景定义为白色,而前景颜色不变:
Vim识别三种不同的终端:term,黑白终端;cterm,彩色终端;gui,Gvim窗口。
term,可以定义其字体显示为:bold、underline、reverse、italic或standout。例如以下命令,用逗号来组合使用这些属性:
cterm,可以用ctermfg设置前景色;用ctermbg设置背景色。例如以下命令,定义蓝底红字并使用下划线来显示注释:
gui,可以使用选项gui=attribute,来定义图形窗口下语法元素的显示属性。选项guifg和guibg,用来定义了前景色和背景色。推荐使用的颜色包括:black, brown, grey, blue, green, cyan, magenta, yellow, white。
为了保持各平台下的一致性,我们应该使用十六进制颜色代码来指定颜色。例如使用以下命令,一次定义几种终端下的配色:
利用hexHighlight.vim插件可以直观的查看配色:点击\F2键,就可以将十六进制颜色代码显示为真实的色彩;再次点击\F2键,则将色彩还原显示为字符。

注意:此插件仅适用于Gvim。
2011
VIM学习笔记 配色方案(Color Scheme)
识别背景色
Vim有两种显示模式:一种是背景为浅色,而另一种是背景为深色。在启动时,Vim会检测使用的是哪一种背景颜色,然后再应用语法高亮的配色方案。我们可以使用:set background?命令,查看当前使用的背景颜色。也可以使用:set background=light或:set background=dark命令,来指定背景颜色。注意:必须在启用语法高亮之前,设置背景色彩。
使用配色方案
Vim如何使用不同颜色显示不同的语法元素是由配色方案(Color Scheme)定义的。输入:colorscheme命令,紧接着一个空格后,然后点击Tab键,将可以遍历所有已安装的配色方案,按下Enter键就可以应用该配色方案。
安装配色方案
你可以先在Vim Color Scheme Test网站中,预览各种配色方案的效果,然后再点击配色方案的名称进行下载安装。你也可以在Vim.org中,查找并下载喜欢的配色方案。你甚至可以下载Color Sampler Pack,然后从其中包含的100个最受欢迎配色方案里慢慢挑选。
将下载的配色方案文件name.vim,放入$VIMRUNTIME/colors目录中;然后执行以下命令,就可以应用这个配色方案了:
:colorscheme name
修改配色方案
我们可以使用:highlight命令,查看当前的配色设定。如果对现在的语法配色不满意,可以使用以下命令进行修改:
:highlight group definition- Cursor,光标下的字符
- Directory,目录名称
- ErrorMsg,在最底行显示的错误信息
- IncSearch,增量(Incremental)查找的匹配结果
- ModeMsg,在左下角显示的模式名称
- MoreMsg,显示更多信息时的提示
- Visual,在可视化模式下被选中的文本
:help group-name:highlight Normal ctermfg=black ctermbg=yellow:highlight Normal\ ctermbg=whiteterm,可以定义其字体显示为:bold、underline、reverse、italic或standout。例如以下命令,用逗号来组合使用这些属性:
:highlight Keyword term=reverse,bold:highlight Comment cterm=underline ctermfg=red ctermbg=blue为了保持各平台下的一致性,我们应该使用十六进制颜色代码来指定颜色。例如使用以下命令,一次定义几种终端下的配色:
:highlight Error term=reverse cterm=blod ctermfg=#00afff ctermbg=#a8a8a8注意:此插件仅适用于Gvim。
:set background | 设置背景颜色 |
:colorscheme | 设置配色方案 |
:highlight | 定义高亮显示 |
2014年8月5日 星期二
tiptop:呼叫SQL and DATE 轉換STRING
DEFINE p_date DATE
DEFINE s_date VARCHAR(10)
LET s_date = g_oea.oea02 USING "yyyy/mm/dd"
PREPARE s2 FROM "select ds.axmt410.get_oeb15(?,?) from dual"
EXECUTE s2 USING g_oea.ta_oea07,s_date INTO p_date
FREE s2
(axmt410.get_oeb15的參數都是VARCHAR2)
鼎新 ERP 技轉課程之 TIPTOP GP 程式開發
http://magicliao.wordpress.com/2010/12/01/%E9%BC%8E%E6%96%B0-erp-%E6%8A%80%E8%BD%89%E8%AA%B2%E7%A8%8B%E4%B9%8B-tiptop-gp-%E7%A8%8B%E5%BC%8F%E9%96%8B%E7%99%BC/
環境架構:
p_zx 為建立使用者帳號的畫面
使用 TELNET 或 SSH 模式登入的話需要在 LINUX 主機建立對應帳號
執行程式呼叫 r.r2 或 exe2 加程式名稱,r.r2 只能在當下目錄執行
執行主功能呼叫 udm7,Web 模式自動呼叫這支程式
在 TIPTOP 任何一支程式中按下 Ctrl+G 可開出 Command Run 畫面
TIPTOP 資料區:
正式區─公司正常運作的區域
測試區─系統測試用,練習操作或測試功能
標準區─鼎新提供版本更新時放在標準區,不可修改
資料夾:
config─參數檔
各模組(aap,adm,aim,atm,azz…)─ERP標準模組,標準模組一律為三碼,a開頭為台灣,g開頭為大陸,c開頭為客製,模組名稱在 p_zmd 中查詢及建立
各模組底下的資料夾:
4gl: Source Code
42m: 編譯後的執行檔
42r: 編譯連結完成的執行檔
4fd: 畫面檔,舊版為 per
42f: 編譯後的畫面檔
sch: 資料結構檔
系統模組(lib,sub,qry)─系統管理模組,lib及sub是不可單獨執行的
lib: 所有作業都必需使用的功能,例如判斷權限
sub: 很多作業都用到的功能,例如自動取號
qry: 查詢資料的功能
系統模組會打包成 42x 檔放在 42m 資料夾底下,使用 r.gx 模組代號,手動打包系統模組的 42x
系統模組函數:
lib函數為 cl_ 開頭;sub 函數為 s_ 開頭;qry 函數為 q_ 開頭
p_link 可查詢作業連結,p_findfunc 可查詢函數名稱
作業命名原則:
一至三碼為模組(範例中的aim),第四碼為程式類型(範例中的第二個i),五至七碼為流水號(範例中的100),範例:aimi100.4gl
程式類型:i─建檔;q─查詢;t─處理;s─參數設定;p─批次處理;r─報表作業;
變數命名原則:
修改原有的作業,不要改名,但要搬到客製區底下,畫面檔也要搬到客製區,新增作業時依命名原則存在客製區,可使用 p_zz 定義作業的執行路徑
資料表命名原則:
前四碼表示資料表開頭,使用二至四碼的英文加數字,後面加上_file,範例:ima_file
欄位名稱為資料表開頭加上流水號,範例:ima01,ima02…
特定用途會用資料表開頭加上用途
索引為資料表開頭加上流水號
Primary Key 為資料表開頭加pk
使用 p_zta 查詢所有的資料結構
資料表的"檔案名稱"及"檔案目的"可以多語系
欄位的"屬性"分為標準(出貨值)及客製(自行新增)
欄位的"欄位說明"可以多語系
「建立Table」的按鈕為新增一個空白資料表,如果已存在會失敗
「資料庫比對」可用來比對指定的來源與目的資料庫Schema的差異
客製 Table 命名原則:
tc_xxx_file:客製新增,xxx為三碼英或數字
ta_xxx_file:修改標準 Table
不允許修改標準欄位的 type,size,不允許更改欄位用途,不允許使用 No Used 的欄位
Config:
4ad: 存放程式 Action 代碼與多語系說明,
TIPTOP 語言代碼:0-繁體中文,1-英文,2-簡體中文
/語言/系統/程式代碼.4ad
4tm: Top Menu 的內容檔案,可在 p_base_act 中查詢
4st: 存放螢幕顯示的 Style
4tb: Toolbar 的內容檔案,可在 p_zz 中查詢
4sm: 存放系統 Start Menu 的內容檔案,可在 p_zm 中查詢
/語言/menu_id.4sm
top.global: 定義 TIPTOP 全系統共用的全域變數
schema: 存放 ds.sch 檔案
dsfgl2.bin: 存放 TIPTOP 提供的系統工具
log: 程式錯誤記錄
p_cron: 存放使用者設定的背景作業的相關檔案,使用 p_cron 設定
環境變數:$開頭,一律為大寫
$XXX─標準模組路徑
$XXXi─系統模組下的 42r
$ORALE_SID─Oracle Instance 變數
系統工具:
rebuild─全系統重新編譯,大概需要兩小時
r.gf─預覽42f,r.gf formname lang p/c y/n
將新增作業加到 Start Menu 時使用 p_zm,建立 Start Menu 時使用 p_zz,模組代號為 “MENU"
交談指令:支援 ON ACTION
CONSTRUCT: 接受畫面輸入的查詢條件轉成 SQL 指令的 WHERE 字串
INPUT/INPUT ARRAY: 接受畫面輸入的值存到資料庫
DISPLAY ARRAY: 將資料庫的值顯示到畫面上
MENU: 表示功能表
PROMPT: 表示彈出式視窗,通常用於顯示訊息並傳回使用者回覆
TIPTOP 標準用法在交談指令中必定要加
ON ACTION controlg:
ON ACTION help: 提供"說明"的資訊
ON ACTION about: 提供"關於"的資訊
ON ACTION locale: 切換語言別
ON IDLE g_idle_seconds: 處理閒置
2014年8月4日 星期一
vim 配色
http://www.puritys.me/docs-blog/article-110-vim-%E9%85%8D%E8%89%B2.html


預設的 vim 只有 16 種顏色,但是改一改設定檔之後,就能夠用 256 種顏色,使用 256 色前,必需先編輯 ~/.vimrc 的檔案,加入這句 「set t_Co=256」。大小寫要一模一樣,否則就沒有作用了。
我的 vim 配色 (黑)
vim 配色程式碼
這段程式碼可以直接寫進 ~/.vimrc ,或是使用建立檔案在 ~/.vim/colors/ 的路徑下,這樣 vim 也會自動載入這個檔案,最後在 ~/vimrc 中加入樣式的名稱 「colorscheme mystyle」。
我的 vim 配色 (白)
黑底白字的配色表看久了,眼睛會開始覺得糢糊,所以後來我又改了一個白底黑字的版本,並且把 c++ , php ,javascript 的 syntax 配色都加上去,用了這個配色之後,字體變清楚了,眼睛也比較不累,又可以長時間加班囉......
這段程式碼可以直接寫進 ~/.vimrc ,或是使用建立檔案在 ~/.vim/colors/ 的路徑下,這樣 vim 也會自動載入這個檔案,最後在 ~/vimrc 中加入樣式的名稱 「colorscheme mystyle_white」。
vim Syntax
除了有配色表之外,還可以針對不同的語言給予不同的 Syntax , 一般來說 c , c++ , php , shell 等等都已經內建在 vim7 的 package 裡了,所以不用煩腦 syntax 問題。
但是像我常常會用 vim 編輯 javascript , 面對沒有 Syntax 的字體,真的是非常辛苦,而增加 javascript syntax 的方式也不會太難,第一步是先下載 javascript syntax http://www.vim.org/scripts/script.php?script_id=1840 ,再將下載回來的檔案改名為 javascript.vim ,並放置在目錄 ~/.vim/syntax/javascrip.vim,最後再更改 「.vimrc」 ,加入語法「 au BufRead,BufNewFile *.sjs set filetype=javascript」。
在製作 vim syntax 配色時,需要一邊修改一邊預覽,這時可以使用 「:syn off | syn on」 這句語法,來重新載入修改後的 syntax 配色表。
其他相關
2014年8月3日 星期日
挑選 Vim 顏色(Color Scheme)
http://blog.longwin.com.tw/2009/03/choose-vim-color-scheme-2009/
Vim 除了預設的顏色外, 除了自己設定, 還是有很多前輩已經設好, 將 Color Scheme 釋放出來.
預設的 default、desert、darkblue 等, 都還蠻不錯的, 另外安裝的 ir_black 也不錯:
挑選、下載 Vim Color Scheme
哪裡可以挑選這些 Color Scheme 呢?
安裝 Vim Color Scheme
挑選到喜歡的 Color Scheme 後, 安裝步驟:
於 Vim 執行時, 切換 Color Scheme
Vim 除了預設的顏色外, 除了自己設定, 還是有很多前輩已經設好, 將 Color Scheme 釋放出來.
預設的 default、desert、darkblue 等, 都還蠻不錯的, 另外安裝的 ir_black 也不錯:
gVim 的 color scheme (ir_black.vim)
挑選、下載 Vim Color Scheme
哪裡可以挑選這些 Color Scheme 呢?
-
Vim 本身就有:
search results : vim online
-
bCentral 很有心的整理出此篇:
Vim Color Scheme Test
, 幫 Color Schemes 都加上預覽圖. (此篇一定要去參考)
安裝 Vim Color Scheme
挑選到喜歡的 Color Scheme 後, 安裝步驟:
- 下載 COLOR_SCHEME.vim
- mkdir ~/.vim/colors/
- mv COLOR_SCHEME.vim ~/.vim/colors/
- vim ~/.vimrc # 加入下述內容
colorscheme COLOR_SCHEME
- 註1: .vimrc 要記得加
set t_Co=256
來支援 256 色的環境, 才不會覺得跟預覽圖不一樣. - 註2:
syntax on
... 這個應該不用多做解釋吧~ XD
於 Vim 執行時, 切換 Color Scheme
- :colorscheme COLOR_SCHEME
2014年8月2日 星期六
工作面試五大要點
http://mag.udn.com/mag/edu/storypage.jsp?f_ART_ID=525266
學校教育通常著重在知識、技能的養成,幫助學生未來能在各產業中發揮所能;然而,要如何爭取到理想工作,卻是時常被忽略的一課。美國網路媒體 THNKR 特此廣邀各領域職涯專家,提醒各位求職朋友面試時需著重的五大重點:
1. Practice and Prepare 練習與準備
萬全準備是求職的關鍵,了解該公司需求,表現出「我不只是要找份工作,而是要為貴公司工作」。此外,面試官不會著重在你過去的職位表現,他們想知道的是「當你面對危機時,你會怎麼處理?」務必準備好此類問題的回答,並多加練習如何清楚表達。
※Due diligence 原為商業用語,指的是企業在併購前對目標公司進行的評估動作,而後衍伸為「審慎調查、實質審查」的意思,現在也經常看到此詞語用在日常生活中。
影片中強調 Do your diligence 就是要求職者在前往面試之前,務必先調查該公司整體背景、營運狀況等,才能讓面試官感受到 You come prepared.(你有備而來)。
2. Be Memorable 加深印象
回答面試官問題時,切記以下三重點:
一、確實回答問題;
二、提出例子,讓面試官留下深刻印象;
三、表達出你的答案對他們、以及對那份工作來說是非常重要的。
面試官通常不是決定是否要雇用你的人,他們需要將資訊轉達至最終決策者,若你的應答能脫穎而出,爭取到職位的機會也相對提高。
3. Think about Perspective 想想對方觀點
「知己知彼,百戰百勝」了解該公司需求,站在面試官角度思考。美國商管類涯暢銷書作者丹尼爾·品克(Daniel H. Pink)表示,許多求職者總是積極推銷自己的能力,強調「該職位由我接手必會不同凡響」;但面試官想要的是「能讓他們的生活更好過」的人,若能表現出這 一面,便能增加你的吸引力。
4. Honesty is the Best Policy 誠實為上策
若是與前公司不歡而散,或是因為某種原因遭到開除,別隱瞞、別說謊。在這資訊交流發達的年代,要查出你的背景完全不費力。記得,別數落前公司的不是,而是要準備談談價值觀的問題,說明你的離開是因為 value clash(價值觀衝突),而不是能力或態度問題。
5. Be Aware of Body Language 注意肢體語言
除言語表達外,肢體語言也能透露出你是否能勝任該職位。面試者常因緊張而往後退、雙手縮到桌面下、或是交叉雙腳,但這些動作都使你變得渺小,可能也表現出不真誠的樣子。將身體稍微往前傾、雙手置於可見範圍、維持良好視線接觸,如此才能傳達熱情及自信。
表現出可靠、真誠、誠實。若不受青睞,表示你並不適合該公司,千萬別放棄,總是會有更好的工作會出現在求職路上。
學校教育通常著重在知識、技能的養成,幫助學生未來能在各產業中發揮所能;然而,要如何爭取到理想工作,卻是時常被忽略的一課。美國網路媒體 THNKR 特此廣邀各領域職涯專家,提醒各位求職朋友面試時需著重的五大重點:
1. Practice and Prepare 練習與準備
萬全準備是求職的關鍵,了解該公司需求,表現出「我不只是要找份工作,而是要為貴公司工作」。此外,面試官不會著重在你過去的職位表現,他們想知道的是「當你面對危機時,你會怎麼處理?」務必準備好此類問題的回答,並多加練習如何清楚表達。
|

影片中強調 Do your diligence 就是要求職者在前往面試之前,務必先調查該公司整體背景、營運狀況等,才能讓面試官感受到 You come prepared.(你有備而來)。
2. Be Memorable 加深印象
回答面試官問題時,切記以下三重點:
一、確實回答問題;
二、提出例子,讓面試官留下深刻印象;
三、表達出你的答案對他們、以及對那份工作來說是非常重要的。
面試官通常不是決定是否要雇用你的人,他們需要將資訊轉達至最終決策者,若你的應答能脫穎而出,爭取到職位的機會也相對提高。
|

「知己知彼,百戰百勝」了解該公司需求,站在面試官角度思考。美國商管類涯暢銷書作者丹尼爾·品克(Daniel H. Pink)表示,許多求職者總是積極推銷自己的能力,強調「該職位由我接手必會不同凡響」;但面試官想要的是「能讓他們的生活更好過」的人,若能表現出這 一面,便能增加你的吸引力。
|

若是與前公司不歡而散,或是因為某種原因遭到開除,別隱瞞、別說謊。在這資訊交流發達的年代,要查出你的背景完全不費力。記得,別數落前公司的不是,而是要準備談談價值觀的問題,說明你的離開是因為 value clash(價值觀衝突),而不是能力或態度問題。
|

除言語表達外,肢體語言也能透露出你是否能勝任該職位。面試者常因緊張而往後退、雙手縮到桌面下、或是交叉雙腳,但這些動作都使你變得渺小,可能也表現出不真誠的樣子。將身體稍微往前傾、雙手置於可見範圍、維持良好視線接觸,如此才能傳達熱情及自信。
|

訂閱:
文章 (Atom)